Category: Scanning

  • Findomain — All Information of Domain

    Findomain — All Information of Domain

    As penetration tester we encounter with web-servers a lot. Before doing any attacks we first study how it is? and gather various information on it which is called “information gathering” sometime it called “reconnaissance” or “recon” in short in cyber security term.

    To do recon we need various tools and websites. We go there and put our target domain or IP and try to gather info about it. But on our this article we are going to learn how we can easily gather information from one tool. This tool is called Findomain. Now this tool will use services we need by it’s own and show us the results. It’s also capable of subdomain monitoring, alerts via Discord, Slack and Telegram, multiple
    API Keys. Lets install Findomain on our Kali Linux system and try to learn about it’s use.

    Findomain on Kali Linux

    Installing Findomain on Kali Linux

    Nah, we should not make a headline about it, it’s very simple, but we have to do it for better Search Engine Optimization. We just need to run following command to install Findomain on our updated Kali Linux system.

    sudo apt install findomain -y

    After applying the above command it will prompt for password of current user. Then the installation of findomain will start on our Kali Linux, as we can see in the following screenshot:

    installing findomain on kali linux

    The installation process will not take a minute, depending on our internet speed and system configuration.

    Using Findomain on Kali Linux

    Before run findomain against any target as always we will take a look on it’s options by running following command:

    findomain -h

    We can see the output in the following screenshot:

    help options for findomain

    Now we can set various platfrom’s API on findomain. For an example we are going to demonstrate how we can set SecurityTrails API on this tool. First we open SecurityTrails website.

    securitytrails homepage

    Then we need to click on “Sign Up Free” on the top right corner. Then we have the “SignUp” page as we can see in the following:

    securitytrails signup

    Here we can upload our details and sign up here. They will verify our email so we need to use original email or temp mail. After the mail verification is complete we can see our accounts page as following:

    securitytrails my account page

     Here we need to click on the “API” section. Then “API Keys”, and we get our API Key, as shown in the following screenshot (Our API Key is hidden due to security reasons):

    SecurityTrails API key

    Here one thing to remember on the basic Free plan of SecurityTrails we can use the API keys 50 times a month.

    Okey, Now we need to set it on our Findomain, we just have to copy our SecurityTrails API key and run the following command on our terminal:

    findomain_securitytrails_token=YourAccessToken

    We can see the above thing on the following screenshot:

    securitytrails API key seiing on findomain on Kali Linux

     Just like this we can add various API’s on our Findomain tool. Here we can know more about it.

    Now run Findomain against a target for an example here we are taking Google (hope they will not mind) and run the following command:

    findomain_securitytrails_token="YourAccessToken" && findomain -t google.com

    The results are as following screenshot:

    findomain working on Kali Linux

    There are many type of uses this tools offers, some of them are as following:

    1. Make a search of subdomains and print the info in the screen:

    findomain -t example.com

    2. Make a search of subdomains and export the data to a output file (the output file name in it case is example.com.txt):

    findomain -t example.com -o

    3. Make a search of subdomains and export the data to a custom output file name:

    findomain -t example.com -u example.txt

    4. Make a search of only resolvable subdomains:

    findomain -t example.com -r

    5. Make a search of only resolvable subdomains, exporting the data to a custom output file.

    findomain -t example.com -r -u example.txt

    6. Search subdomains from a list of domains passed using a file (we need to put a domain in every line into the file):

    findomain -f file_with_domains.txt

    7. Search subdomains from a list of domains passed using a file (we need to put a domain in every line into the file) and save all the resolved domains into a custom file name:

    findomain -f file_with_domains.txt -r -u multiple_domains.txt

    8. Query the Findomain database created with Subdomains Monitoring.

    findomain -t example.com --query-database

    9. Query the Findomain database created with Subdomains Monitoring and save results to a custom filename.

    findomain -t example.com --query-database -u subdomains.txt

    10. Import subdomains from several files and work with them in the Subdomains Monitoring process:

    findomain --import-subdomains file1.txt file2.txt file3.txt -m -t example.com

    Findomain notifications on Telegram/Discord/Slack

    Findomain was one of the first tools to use a relational database for tracking subdomains. It can manage millions or even trillions of subdomains, as well as thousands of them at once.

    First, we need to choose how we want to receive notifications. The options include Discord, Slack, or Telegram. Here, in the official documentations we can easily learn how to set it up for Discord, Slack and Telegram webhook.

    There are some of the uses. We can know about more uses on Findomain’s GitHub page.

    This is how we can install and run Findomain on our Kali Linux, which is the fastest and complete solution for domain recognition. Supports
    screenshoting, port scan, HTTP check, data import from other tools,
    subdomain monitoring, alerts via Discord, Slack and Telegram, multiple
    API Keys for sources and much more.

    Enjoy our articles? Make sure to follow us on Twitter and GitHub, we post article updates there. To join our KaliLinuxIn family, join our Telegram Group & Whatsapp Channel. We are striving to build a community for  Linux and  cybersecurity. For anything we always happy to help everyone on the comment section. As we know our comment section is always open to everyone. We read each and every comment and we always reply.

  • Find Vulnerabilities using NMAP Scripts (NSE)

    Find Vulnerabilities using NMAP Scripts (NSE)

    Nmap comes pre-installed with Kali Linux. Not just Kali Linux Nmap comes pre-installed with every security focused operating system. We have already discussed how to use Nmap for active reconnaissance in our previous article “NMAP — The Network Mapper“.

    But cybersecurity experts don’t just use Nmap for scanning ports and services running on the target system, Nmap also can be used for vulnerability assessment and much more using NSE (Nmap Scripting Engine).

    Vulnerability scanning using nmap scripts

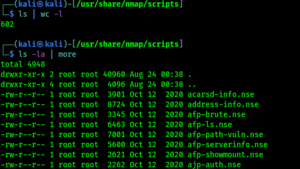
    The Nmap Scripting Engine (NSE) has revolutionized the possibilities of a port scanner by allowing users to write scripts that perform custom tasks using the host information collected by Nmap. As of December 2024, when we are writing this article, Nmap has over 9k+ scripts on Nmap version 7.94.

    Nmap scripts for security testing
    It’s an older image of nmap version 7.91 which have almost 5k NSE scripts

    Penetration testers uses Nmap’s most powerful and flexible features, which allows them to to write their own scripts and automate various tasks. NSE (Nmap Scripting Engine) was developed for following reasons:

    • Network Discovery:- This is the primary purpose that most of the people utilize Nmap for network port discovery, which we had learned in our “Nmap – The Network Mapper” article.
    • Classier version detection of a service:- There are tons of services with multiple version details for the same service, so Nmap makes it more easy to identify the service.
    • Backdoor detection:- Some of the Nmap scripts are written to identify the pattern of backdoors. If there are any worms or malicious program infecting the network, it makes the attacker’s job easy to short down and focus on taking over the machine remotely.
    • Vulnerability Scanning:- Pen testers also uses Nmap for exploitation in combination with other tools such as Metasploit or write a custom reverse shell code and combine Nmap’s capability with them for exploitation.

    Before jumping in to finding vulnerabilities using Nmap we must need to update the database of scripts, so newer scripts will be added on our database. Then we are ready to scan for vulnerabilities with all Nmap scripts. To update the Nmap scripts database we need to apply following command on our terminal window:

    sudo nmap --script-updatedb

    In the following screenshot we can see that we have an updated Nmap scripts database.

    nmap script database update

    Now we are ready to scan any target for vulnerabilities. Well we can use following command to run all vulnerability scanning scripts against a target.

    nmap -sV --script vuln <target>

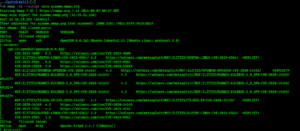
    As we can see in the following screenshot:

    nmap vulnerability scripts

    When we are talking about Nmap Scripts then we need to know that, not only vulnerability scanning (vuln) there are lots of categories of Nmap scripts those are following:

    • auth: This categorized scripts related to user authentication.
    • broadcast: This is a very interesting category of scripts that use broadcast petitions to gather information. 
    • brute: This category is for scripts that help conduct brute-force password auditing.
    • default: This category is for scripts that are executed when a script scan is executed ( -sC ).
    • discovery: This category is for scripts related to host and service discovery.
    • dos: This category is for scripts related to denial of service attacks.
    • exploit: This category is for scripts that exploit security vulnerabilities.
    • external: This category is for scripts that depend on a third-party service. 
    • fuzzer: This category is for Nmap scripts that are focused on fuzzing.
    • intrusive: These scripts might crash system by generate lot of network noise, sysadmins considers it intrusive.
    • malware: This category is for scripts related to malware detection.
    • safe: This category is for scripts that are considered safe in all situations.
    • version: This category is for NSE scripts that are used for advanced versioning.
    • vuln: This category is for scripts related to security vulnerabilities.

    So we can see that we can do various tasks using Nmap using Nmap Scripting Engine scripts. When we need to run all the scripts against single target we can use following command:

    nmap -sV --script all <target>

    In the following screenshot we can see that all scripts are using against one target, but here every script will run so it will consume good amount of time.

    nmap all scripts running at once

    That is all for this article. We will back again with Nmap. Hope this article helps our fellow Kali Linux users. Really love our articles? Make sure to follow us to get all our articles directly on notification. We are also available on Twitter and GitHub, we post article updates there. To join our KaliLinuxIn family, join our Whatsapp Channel & Telegram Group. We are trying to build a community for Linux and Cybersecurity. For anything we always happy to help everyone on the comment section. As we know our comment section is always open to everyone. We read each and every comment and we always reply.

  • Wapiti — Automated Vulnerability Scanner

    Wapiti is an advanced automated command line vulnerability scanner. It helps penetration testers and bug bounty hunters to scan web based application to make it secure or search for loopholes. It is free and open source and has had some recent edits and updates. It comes with Kali Linux.

    wapiti automatic vulnerability scanner

    Wapiti Key Features

    Wapiti can detect lots of vulnerabilities, so we don’t need to manually visit every pages of an web application to find vulnerabilities. Wapiti can find following vulnerabilities:

    1. File disclosure (Local and remote include/require, fopen, readfile…)
    2. Database Injection (PHP/JSP/ASP SQL Injections and XPath Injections)
    3. XSS (Cross Site Scripting) injection (reflected and permanent)
    4. Command Execution detection (eval(), system(), passtru()…)
    5. CRLF Injection (HTTP Response Splitting, session fixation…)
    6. XXE (XML External Entity) injection
    7. SSRF (Server Side Request Forgery)
    8. Use of know potentially dangerous files (by using the Nikto database)
    9. Weak .htaccess configurations that can be bypassed
    10. Presence of backup files giving sensitive information (source code disclosure)
    11. Shellshock (aka Bash bug)
    12. Open Redirects
    13. Uncommon HTTP methods that can be allowed (PUT)

    Installing and Using Wapiti on Kali Linux

    Wapiti latest version (3.0.3 now) comes pre-installed with Kali Linux, if some Kali Linux lighter version doesn’t have it installed then we can install it by simply using following command:

    sudo apt-get install wapiti

    After installing this we can check the help section of this tool by applying following command:

    wapiti -h

    The following screenshot shows the output of the applied help command:

    wapiti help menu

    Now we can run this tool against a website by using following command:

    wapiti -u https://target.site/

    Then it will scan the website (https://target.site/ is just an example) for URL’s. After the scanning process is done wapiti will run various modules for finding the vulnerabilities. We can see it on the following screenshot:

    wapiti simple scanning
    We run it on mutillidae web application on localhost

    Wapiti crawls all the pages and runs its modules on all the pages so it might be time consuming. On our this localhost machine it took more than 18 minutes to complete the scan and running the all modules. On a real website it might take hours.

    If the website of web application have too many pages then it might take a very long time. Fortunately we can skip the modules. Suppose we know that our target website have not any blindsql vulnerability then we can skip this module. When the module blindsql is working we need to to press CTRL+C.

    Then it will prompt with some options as the following screenshot:

    Skipping modules

    Here if we press ‘r’ & Enter, then it will stop everything and generate the report. If we want to skip the running module then we just need to press ‘n’ and Enter, then wapiti will skip the module and run the next module.

    Even we can continue the current attack using ‘c’, and quit without generating report by pressing ‘q’.

    After the scan is complete we can see a HTML report is crated on our /home/kali/.wapiti/generated_report directory.

    We can navigate to the directory from file manager (on in terminal using cd command):

    wapiti generated report

    Now we can open this on browser to see the full report. As we did in the following screenshot:

    wapiti full report

    We can click on the found vulnerabilities to get additional information on this. Here is an closer look of XSS vulnerability on this Wapiti report.

    XSS vulnerability found using Wapiti

    This is how Wapiti works. It’s very useful for cybersecurity researchers and bug bounty hunters.

    There are lots of options in this tool we just checked the basics on our above section.

    Wapiti can pause the scan and resume it later (It’s very useful because sometimes it took whole day or more than it).

    We can save our Wapiti report HTML file on a required directory by using following command:

    wapiti -u https://target.site/ -o /home/kali/Desktop

    Please don’t forget to add a ‘/’ after the target site (it requires the full address like https://mytarget.com/ not like mytarget.com ), otherwise Wapiti will not think the address is complete.

    We can check the help section of this tool for more information. Carefully check the help section and tell us,

    “What command we need to use if we just use the blindsql module on a website called https://target.com/ ?”

    Got the answer? Please comment in the comment section. Question and answer will improve our learning.

    Love our article? Make sure to follow us on Twitter and GitHub, we post article updates there. To join our KaliLinuxIn family, join our Telegram Group & Whatsapp Channel. We are striving to build a community for  Linux and cybersecurity. For anything we always happy to help everyone on the comment section. As we know our comment section is always open to everyone. We read each and every comment and we always reply.

  • Install Nessus Vulnerability Scanner on Kali Linux

    In this detailed article we learn “How to install Nessus on Kali Linux 2024.x“. Nessus is a very popular and widely used vulnerability scanner and assessment tool for testing web application and mobile application.

    Nessus will be very helpful for penetration testers and bug bounty hunters. Nessus also helpful for web and mobile app developers to find and fix vulnerabilities. 

    Install Nessus on Kali

    Nessus is always updated and useful libraries for vulnerability and configuration checks. Also it’s analysis is very fast and accurate.

    Key-Features of Nessus

    • The latest intelligence, rapid updates, an easy-to-use interface.
    • Covers an industry-leading 50,000+ vulnerabilities.
    • Network devices: Nessus can audit firewalls/routers/switches (Juniper, Check Point, Cisco, Palo, Alto Networks), printers, storage.
    • Virtualization: Nessus also can audit Virtual Systems like, VMware, VirtualBox, ESX, ESXi, vSphere, vCenter, Hyper-V, and Citrix Xen Server.
    • Operating systems: Nessus can run against Windows, Mac, Linux, Solaris, BSD, Cisco iOS, IBM iSeries.
    • Databases: It will scan inside various databases like, Oracle, SQL Server, MySQL, DB2, Informix/DRDA, PostgreSQL, MongoDB
    • Web applications: Nessus can find vulnerabilities in Web servers, web services, OWASP vulnerabilities.
    • Cloud: We can use Nessus to scans cloud applications and instances like Salesforce and AWS et.
    • Compliance: Helps meet government, regulatory and corporate requirements. Nessus also will be useful for personal and development uses.

    Installing Nessus on Kali Linux 2024.x

    Nessus doesn’t comes pre-installed with Kali Linux, so we need to download and install it manually.

    Nessus vulnerability scanner package is available for download in Tenable’s site. This is the official download site for Nessus.

    Nessus selecting proper version for download for Kali Linux

    After selecting proper version of Nessus (Linux Debian amd64) for our system we need to click on Download as shown in the following screenshot.

    Downloading Nessus from official website

    After we download Nessus installer file for our Kali Linux system. It will be saved on our Downloads folder. So we open the terminal and apply command cd Downloads to move to our working directory to Downloads and run following command to install Nessus on Kali.

    sudo dpkg -i Nessus*.deb

    Then it will start installing as shown in the following screenshot:

    Installing Nessus deb file in Kali Linux

    Okey, It is now installed. Let’s check if the installation is correct and Nessus is working or not.

    First we enable Nessus service by using following command:

    sudo systemctl enable nessusd

    This command will enable nessusd services. After this we can start this service by using following command:

    sudo systemctl start nessusd

    Then we can check if it is running successfully or not via applying following command:

    sudo systemctl status nessusd.service

    If everything will be perfect then it should show outputs as following screenshot.

    Nessus service is running sucessfully

    In the above screenshot we can clearly see that Nessus service (nessusd) is active and running successfully.

    Nessus installed successfully

    Now we can run this. We need to open our web browser and navigate to https://localhost:8834 here we might got security warnings form browser but we can ignore it, because it is our localhost.

    avoiding the browser warnngs

    So we go to Advanced and processed to localhost.

    Then we reach the beautiful Nessus Setup, as shows in the following screenshot:

    Nessus Set-UP

    Here we can “Continue” with “Nessus Essentials”. Then we got a form asking about our details like name and e-mail id. Here we need to provide a original e-mail id because Nessus will verify it. So we fill it and click to 

    Nessus setup form fill up

    Then we click on “E-mail” and an “Activation Code” will be send to our given e-mail id.

    Nessus activation

    Now we give the “Activation Code” and click on “Continue”, in the following screenshot we have hided our activation code.

    Nessus sends activation code

    Then we need to create user by creating username and password for login.

    Creating username and paswsword for nessus

    Then we can login. After login we see the front page of Nessus.

    Nessus front page

    Here we can submit our targets. Targets like hostnames, IP address (IPV6 or IPV4), to scan the target. We can put networks here to scan.

    Similarly we can close this and click on “New Scan” to add targets, here we got lots of options as we can see in the following screenshot.

    nessus new scan

    From here we can scan our targets and know about it’s vulnerabilities.

    Nessus is very useful for security researcher and it is very easy to use it. So in this tutorial we learned how we can install Nessus on Kali.

    We can stop Nessus service on our system after using it by applying following command:

    sudo systemctl stop nessusd

    To start it again we can use:

    sudo systemctl start nessusd

    Then we just can go to https://localhost:8834 for Nessus.

    Nessus also have a Paid Professional version to know about it please check this.

    Love our article? Make sure to follow us on Twitter and GitHub, we post article updates there. To join our KaliLinuxIn family, join our Telegram Group & Whatsapp Channel. We are striving to build a community for Linux and cybersecurity. For anything we always happy to help everyone on the comment section. As we know our comment section is always open to everyone. We read each and every comment and we always reply.

  • Parsero — Scan for Vulnerability

    The world of cybersecurity is really thrilling where every click, tap and byte counts. Today, we are going to learn the basics with a nifty tool called Parsero on our Kali Linux system.

    Parsero is like a digital bloodhound with a mission to sniff out vulnerabilities in websites. It’s basically like our cyber detective buddy, equipped with the skills to uncover any hidden threats lurking in the depth.

    Parsero Scan for Vulnerability on Kali Linux

     Now let’s get our hands dirty and dive into the action.

    First of all we need to have Parsero tool on our system. Don’t worry it comes pre-installed with our Kali Linux full version if not we can simply install it by using following command on our Kali Linux Terminal:-

    sudo apt install parsero -y

    Then it will prompt for our root password and it will be installed within some seconds.

    Before use Parsero on our Kali Linux system let we check the options of this tool by using following command:

    parsero -h

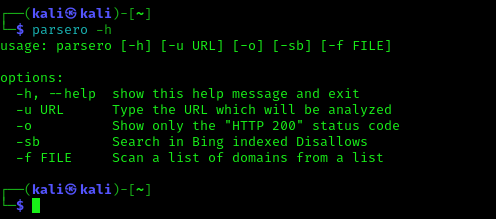
    The above command will show the help of Parsero tool as we can see it on the following screenshot.

    Parsero help options on Kali Linux

    Let’s run it against a target. Lord Google can be an example just for scanning purpose. We are not really attacking the Lord of surface internet. We should not attack any website without proper legal written permission. We can create our own vulnerable site for that. So the command will be as following:

    parsero -u https://www.google.com

    We can see the result of the above command in the following screenshot:

    parsero performing aginst a target

    In the above screenshot we can see that Parsero is performing well and finding some directories.

    Parsero is actually a Python script which reads the robots.txt of a website and looks at the Disallow entries. The Disallow
    entries tell the search engines what directories or files hosted on a
    web server mustn’t be indexed. For example, “Disallow: /portal/login”
    means that the content on www.example.com/portal/login it’s not allowed
    to be indexed by crawlers like Google, Bing, Yahoo etc. This is the way
    the administrator have to not share sensitive or private information
    with the search engines.

    But sometimes these paths typed in the Disallows entries are directly
    accessible by the users without using a search engine, just visiting
    the URL and the Path, and sometimes they are not available to be visited
    by anybody. Because it is really common that the administrators write
    a lot of Disallows and some of them are available and some of them are
    not, we can use Parsero in order to check the HTTP status code of each
    Disallow entry in order to check automatically if these directories are
    available or not.

    Also, the fact the administrator write a robots.txt, it doesn’t mean
    that the files or directories typed in the Dissallow entries will not
    be indexed by Bing, Google, Yahoo, etc. For this reason, Parsero is
    capable of searching in Bing to locate content indexed without the web
    administrator authorization. Parsero will check the HTTP status code in
    the same way for each Bing result.

    We can see there are a lots of red lines on Parsero result which indicates

    1. 200 OK               The request has succeeded.
    2. 403 Forbidden    The server understood the request, but is refusing to fulfill it.
    3. 404 Not Found    The server hasn’t found anything matching the Request-URI.
    4. 302 Found           The requested resource resides temporarily under a different URI (Uniform Resource Identifier).

    If we want to see only the “HTTP 200” status code then we have to use the -o flag just like following:

    parsero -o -u https://www.google.com

    In the following screenshot we can see only the “HTTP 200” status codes.

    parsero http 200 status codes only

    Also If we have a list of domains to run Parsero then we can note down those websites on a text file each on a line just like the following screenshot:


    Parsero target list

    If we have another targets we can add them like the above. Now we can scan the list with Parsero. Before that we need to specify our website’s list named ‘targets.txt’, which is stored on our Desktop and we also want to see “HTTP 200” status codes only. So our command will be following:

    parsero -o -f ~/Desktop/targets.txt

    After running the above command Parsero will start scanning the websites given on the list as we can see in the following screenshot.

    Parsero on multiple targets

    Once Parsero completes its scan, it’ll spit out a detailed report
    highlighting any potential vulnerabilities it found. We need to pay close attention
    to these findings as it will give us valuable insights into how secure
    (or not-so-secure) the website is.

    And there we have it, folks! We’ve just dipped our toes into the
    world of cybersecurity with Parsero on Kali Linux. But remember, this is
    just the beginning. The cyber realm is vast and ever-evolving, so we need to stay
    curious, keep learning, and never underestimate the power of a good
    cyber tool in our arsenal. Happy hunting, and may the digital winds be
    ever in our favor!

    Love our article? Make sure to follow us on Twitter and GitHub, we post article updates there. To join our KaliLinuxIn family, join our Telegram Group & Whatsapp Channel We are trying to build a community for Linux and Cybersecurity. For anything we always happy to help everyone on the comment section. As we know our comment section is always open to everyone. We read each and every comment and we always reply.

  • Ping — Know the Target (Ping Pong)!

    Ping Pong! No we are not in wrong article. In this article we are going do discuss about the ping tool. Ping is the most famous tool that is used to check whether a particular host is available or not. tool works by sending an Internet Control Message Protocol (ICMP) echo request packet to the target host. If the target host is available and the firewall is not blocking the ICMP echo request packet, it will reply with the ICMP echo reply packet.

    ping on Kali Linux

    From the web hosting point of view, Ping usually used to check if the website is up and sends an alert if the site is down. This can be useful for monitoring the uptime and performance of the website, as well as ensuring that the website is accessible to the visitors.

    But a cybersecurity expert never thinks like normal humans. In cybersecurity point of view, website ping can be used as part of a bigger suite of tools to know the security of a website or network. Here are a some examples of how website ping can be used in cybersecurity:

    • Network Mapping: By pinging various IP addresses, security professionals
      can create a map of the network and identify active hosts. This can
      help to identify potential targets for attacks, as well as monitor
      changes to the network over time.
    • Detecting Intruders: By pinging a network regularly, security
      professionals can detect unauthorized access to the network. For
      example, if an IP address that was not previously in the network map
      suddenly starts responding to pings, it may indicate the presence of an
      intruder.
    • Denial-of-Service (DoS) Attacks: By pinging a website continuously and
      in a coordinated manner from multiple sources, an attacker can cause the
      website to become unavailable to users. By monitoring the response time
      of the website, security professionals can detect the onset of a DoS attack and take steps to mitigate it.
    • Vulnerability Scanning: Website ping can be used in conjunction with
      other tools, such as port scanners and vulnerability scanners, to
      identify potential weaknesses in a network. For example, a vulnerability
      scanner might use website ping to check if a web server is responsive,
      and then use other tools to determine if the web server is vulnerable to
      attack.

    Without wasting any more time with the theories lets jump to the practicals. Although we can’t find the ping tool in Kali Linux application menu but in our terminal we can ping -h command to see the help section of the ping tool.

    ping -h

    In the following screenshot we can see the help of ping.

    help of ping on Kali Linux

    Now we run the ping with a destination address. For an example we use IP address of Facebook. We use following command:

    ping 31.13.79.35

    In the following screenshot we can see the output of the above command.

    ping facebook ip from Kali Linux

    By default, ping will run continuously until we press Ctrl + C and stop it.

    We also can use a domain name to ping. Ping will automatically fetch the IP, if the target not behind a firewall.

    ping facebook.com

    In the following screenshot we can see that ping is started and it’s automatically find facebook’s IP address.

    ping facebook.com from Kali Linux

    This was the basic example, ping toll has lot of options inside it, but few of them are widely used. Those are following:

    • -c count: This is the number of echo request packets to be sent.
    • -I interface address: This is the network interface of the source address. The argument may be a numeric IP address (such as 192.168.0.108) or the name of the device (like eth0, wlan0). This option is required if we want to ping the IPv6 link-local address.
    • -s packet size: This specifies the number of data bytes to be sent. The default is 56 bytes, which translates into 64 ICMP data bytes when combined with the 8 bytes of the ICMP header data.

    We will discuss about these with example.

    Assume that we are starting with internal penetration testing work. The customer gave us access to their network using a LAN cable. And, they also gave us the list of target servers’ IP addresses.

    The first thing we would want to do before launching a full penetration testing arsenal is to check whether these servers are accessible from our machine. We can use ping for this task.

    Our target server is located at 192.168.0.1, while our machine has an IP address of 192.168.0.108. To check the target server availability, we can give the following command:

    ping -c 1 192.168.0.1

    In the following screenshot is the result of the preceding ping command:

    ping on local target

    From the above screenshot, we know that there is one ICMP echo request packet sent to the destination (IP address: 192.168.0.1). Also, the sending host (IP address: 192.168.0.108) received one ICMP echo reply packet. The round-trip time required is 2.208 ms (millisecond), and there is no packet loss during the process.

    Let’s see the network packets that are transmitted and received by our machine. We are going to use Wireshark, a network protocol analyzer, on our machine to capture these packets, as shown in the following screenshot:

    ping network packets capturing on wireshark

    From the above screenshot, we can see that our host (192.168.0.1) sent one ICMP echo request packet to the destination host (192.168.0.108). Since the destination is alive and allows the ICMP echo request packet, it will send the ICMP echo reply packet back to our machine.

    If our target is using an IPv6 address, such as fe80::e82a:e363:100d:9b02, we can use the ping6 tool to check its availability. We need to give the -I option for the command to work against the link-local address:

    ping6 -c 1 fe80::e82a:e363:100d:9b02 -I wlan0

    The following screenshot shows the packets sent to complete the ping6 request:

    ping6 for IPV6

    Here ping6 is using the ICMPv6 request and reply.

    To block the ping request, our firewall can be configured to only allow the ICMP echo request packet from a specific host and drop the packets sent from other hosts. This is how we can use ping and know things about our host. This is the primary thing for penetration testers.

    That’s for today. Love our articles? Make sure to follow us on Twitter and GitHub, we post article updates there. To join our KaliLinuxIn family, join our Telegram Group & Whatsapp Channel We are trying to build a community for Linux and Cybersecurity. For anything we always happy to help everyone on the comment section. As we know our comment section is always open to everyone. We read each and every comment and we always reply.

  • GSM Signal Tapping using RTL-SDR

    In our previous articles we learnt the basics of RTL-SDR
    and Created our own airplane radar using RTL-SDR using our Kali Linux system. So in
    this article we are not going to cover the basics again. Please make
    sure to read our previous articles carefully. One more thing, buying RTL-SDR from our Amazon link will support us, we earn a little commission income.

    Mobile call hacking using Kali Linux

    In our this detailed article we are going to discuss about scanning and analyzing GSM traffic using our RTL-SDR on Kali Linux with the help of kalibrate-rtl tool. This tool can scan for GSM based stations in a frequency band.

    Scanning for GSM Signals

    As we told we are going to use kalibrate-rtl or kal tool to scan GSM traffic. So we need to install it on our system. We can easily install it on our Kali Linux by applying following command:

    sudo apt install kalibrate-rtl -y

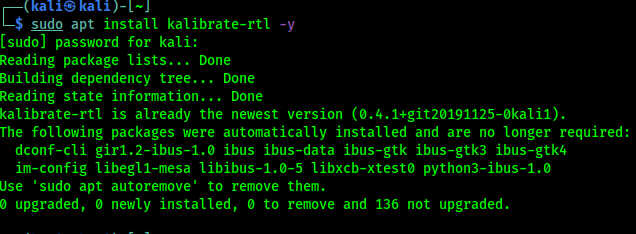
    In the following screenshot we can see the output:

    kalibrate-rtl tool installed on our Kali Linux system
    kalibrate-rtl is already installed on our Kali Linux system

    Most of the countries use GSM900 band, but in USA it’s GSM850. We are scanning for GSM900 band, our USA friends need to use GSM850 in the place of GSM900.

    We need to plugin our RTL-SDR with antenna at first, Then to scan GSM900 traffic we run following command on our terminal:

    kal -s GSM900 -g 40

    The following screenshot shows the output of the above command:

    kalibrating GSM signals

    In the above screenshot we can see that there are many channels, but we need to note the frequencies, in our case we are going to use 953.4MHz.

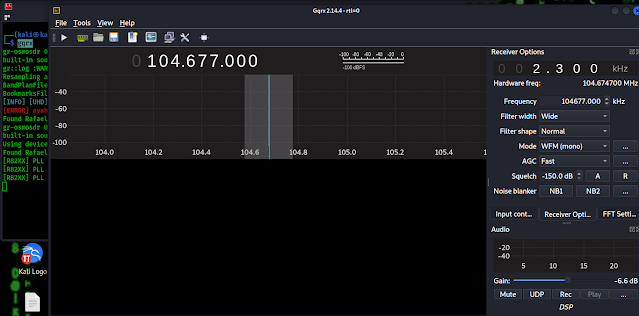
    Now we open GQRX tool and enter the frequency in the Receiver Options window, shown in the following screenshot:

    gqrx showing GSM signal

    We can see the waterfall that the device is able to catch the signals perfectly.

    Analyzing GSM Packets

    Now we need to install gr-gsm tool by using following command:

    sudo apt install gr-gsm -y

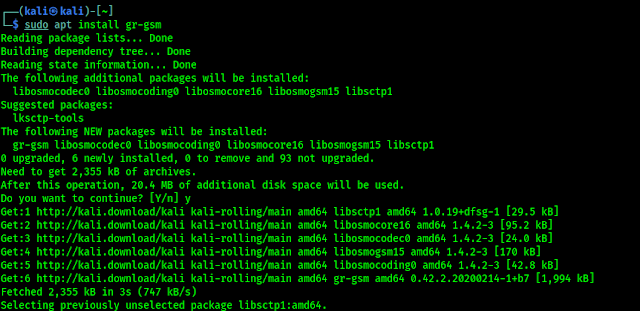
    We can see the output in the following screenshot:

    installing gr-gsm on Kali Linux

    This gr-gsm tool will help us to look the data at the packet level. After the installation process is done, we need to run following command to start the monitoring packets:

    grgsm_livemon

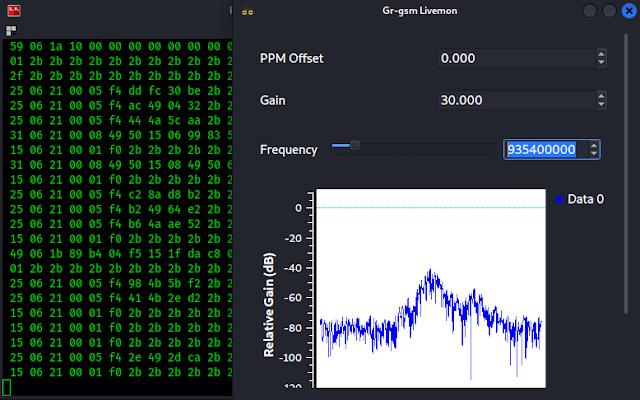
    Here a new window will open, we will change the frequency we are working with (we had noted the 935.4MHz while using kalibrate). As we can see in the following screenshot:

    grgsm livemon

    On the gr-gsm livemon window we can see the frequency and in the terminal window we can see the data traffic. Now we need to analyze the data packets using Wireshark. We leave this gr-gsm livemon terminal and window as it is capturing packets and open our Wireshark from application menu or from another terminal using wireshark command.

    wireshark taffic analysis

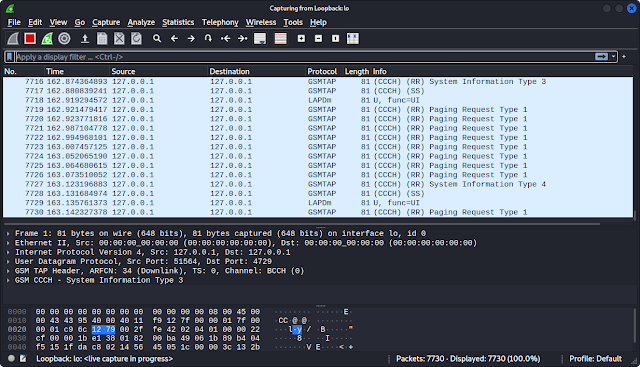
    Here we need to select the interface. Our interface will be Loopback: lo by double clicking over it. Then we can see the packets on the Wireshark, as following screenshot:

    gsm packats on wireshark

    We need to apply the display filter now. We need to add the filter gsmtap. Then we need to look on the packet Info tab for System Information Type 3.

    System information type 3 on Wireshark

    Now we need to check the GSM CCCH > Location Area Identification (LAI). There we will get the information about the data packets. Shown in the following screenshot:

    captured gsm traffic information using rtl-sdr and wireshark on Kali Linux

    In the highlighted line we can see that the mobile network provider is BSNL and this packets are transmitting from West Bengal. This is how we analyze GSM signal and how GSM packets travel on our Kali Linux.

    This is how we can analyze GSM packets using RTL-SDR on our Kali Linux system. We can’t say much for our ethical policy. Everything more than above can be misused. There are lots of good tutorials on GSM sniffing on the internet we just need to find out them, we just made an easy start. Our suggestion will be crazydanishhacker, he is far batter than us on this topic. He did well in his website and YouTube channel.

    Love our articles? Make sure to follow us on Twitter and GitHub, we post article updates there. To join our KaliLinuxIn family, join our Telegram Group. We are trying to build a community for Linux and Cybersecurity. For anything we always happy to help everyone on the comment section. As we know our comment section is always open to everyone. We read each and every comment and we always reply.

  • Beginners Guide of RTL SDR (Software Defined Radio) on Kali Linux

    SDR stands for Software defined Radio which is a radio communication system where components that have been traditionally implemented in hardware. We can use a SDR device as our super ear like Daredevil.

    What is a RTL SDR?

    In February 2012 the first FM radio signal was received with an RTL2832U chipset (Created for Digital HD TV), and RTL-SDR dongle using custom SDR drivers, After then tons of security researchers, hackers, makers, students and electronics lovers bought the RTL-SDR devices.

    Basically RTL SDR device is a software defined radio signal receiver, wait a minute! Did we just say Radio signal receiver? Isn’t it actually my grandfather’s FM radio does? Not like that actually The FM radios signals used to carry commercial radio signals between 88 and 108 MHz. An RTL SDR can go through a very wide range (22-2200 MHz, depending on tuner model). We had mentioned this device on our Hardware for Hackers article. A RTL SDR device is looks like following:

    RTL SDR Software Defined Radio on Kali Linux

    We can buy this device from Amazon.

    buy rtlsdr on amazon

    What we can do with RTL SDR?

    We can do a lot of things with a RTL-SDR device they are following:

    • Listening to FM radio.
    • Tracking aircraft positions like a radar with ADS-B decoding.
    • Listening to unencrypted Police/Ambulance/Fire/EMS conversations.
    • Listening to aircraft traffic control conversations.
    • Decoding aircraft ACARS short messages.
    • Scanning trunking radio conversations.
    • Decoding unencrypted digital voice transmissions.
    • Tracking maritime boat positions like a radar with AIS decoding.
    • Decoding POCSAG/FLEX pager traffic.
    • Scanning for cordless phones and baby monitors.
    • Tracking & receiving meteorological agency launched weather balloon data.
    • Tracking our own self launched high altitude balloon for payload recovery.
    • Receiving wireless temperature sensors and wireless power meter sensors.
    • Listening to VHF amateur radio.
    • Decoding ham radio APRS packets.
    • Watching analogue broadcast TV.
    • Sniffing GSM signals.
    • Using RTL-SDR on your Android device as a portable radio scanner.
    • Receiving GPS signals and decoding them.
    • Using RTL-SDR as a spectrum analyzer.
    • Receiving NOAA weather satellite images.
    • Listening to satellites and the ISS.
    • Listening to unencrypted military communications.
    • Radio astronomy.
    • Monitoring meteor scatter.
    • Listening to DAB broadcast radio.
    • Use RTL-SDR as a panadapter for your traditional hardware radio.
    • Decoding taxi mobile data terminal signals.
    • Use RTL-SDR as a true random number generator.
    • Listening to amateur radio hams on SSB with LSB/USB modulation.
    • Decoding digital amateur radio ham communications such as CW/PSK/RTTY/SSTV.
    • Receiving HF weatherfax.
    • Receiving digital radio mondiale shortwave radio (DRM).
    • Listening to international shortwave radio.
    • Looking for RADAR signals like over the horizon (OTH) radar, and HAARP signals.

    We can see there are tons of work can be done with the RTL-SDR device.

    Requirements to use RTL-SDR?

    1. First of all we need a RTL-SDR device, We got our RTL-SDR device from NooElec for testing, a special thanks to them. We can buy this model on Amazon. It comes with three type of antennas, a coax cable and obviously a RTL-SDR device with RTL2832U chipset.
    2. We also need a Kali Linux desktop/laptop or a Raspberry Pi, any other OS like other Linux distros, Mac even Windows also works with RTL-SDR. But here we are going to do our stuffs with our most loved Kali Linux.
    3. We need a RTL-SDR software (Most of which is free and open-source).

    Setting up RTL-SDR on Kali Linux

    In this article we are going to set up and RTL-SDR device on our Kali Linux system and test it with it’s a basic use.

    First of all we need to make ready our RTL-SDR device, connect it with the coax cable and attach antenna. Then plug it to our system’s USB port. After plugging it in we need to check if our system is recognizing it by using following command:

    sudo lsusb

    In the following screenshot we can see our RTL2831U chipset, in the highlighted area.

    rtl sdr is connected

    It’s fine, our RTL-SDR device is connected to our system. But here is a problem, as we told this RTL2832U chipset is created for TV so default Debian driver may think it as a TV Tuner. We need to fix it at first. We have to blacklist those drivers to do so.

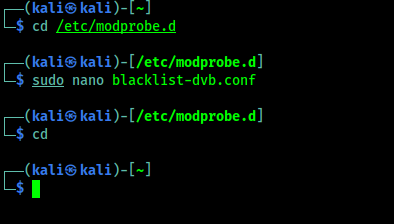
    We need to go to the /etc/modprob.d directory by using following command:

    cd /etc/modprobe.d

    Here we need to use the following command:

    sudo nano blacklist-dvb.conf

    Then nano will open in front of us as we can see in the following screenshot:

    nano for creating configuration file

    Here we need to type following lines:

    blacklist dvb_usb_rtl28xxu

    We did it, shown in the following screenshot:

    blacklisting default debian drivers

    Then we press CTRL+X then we press Y then we need to press Enter ⤶ to save this file and exit.

    Debian default drivers and exit
    We had used cd command to get back to our home directory.

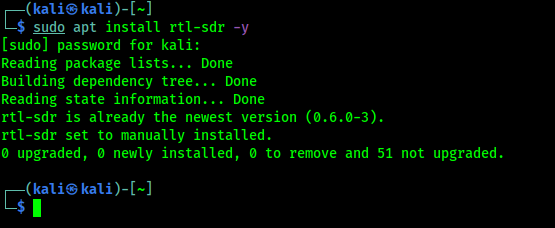
    Now we need to test our RTL-SDR device if it is working perfectly. To do that we need to install rtl-sdr package on our system by using following command:

    sudo apt install rtl-sdr -y

    In the following screenshot we can see the output of above command:

    installing rtlsdr packages on Kali Linux
    It is already installed on our system

    Now to check if our RTL-SDR is working perfectly we need to run following command on our terminal window:

    rtl_test

    After some seconds we can cancel it and check for data losses (after the initial one). If we didn’t see ant packet losses message then it is working fine.

    rtl sdr device testing

    Now we had almost completed our RTL-SDR setup on our Kali Linux we just need to install an RTL-SDR software to tune.

    Installing and Using GQRX on Kali Linux

    We are going to install an open-source software called GQRX.

    GQRX is an open-source software-defined radio (SDR) receiver powered by the GNU radio and the Qt graphical toolkit.

    GQRX has many features such as:

    • Discovering devices connected to a computer.
    • Processing I/Q data.
    • AM, SSB, CW, FM-N and FM-W (mono and stereo) de-modulators.
    • Recording and playing back audio to/from WAV file.
    • Recording and playing back raw baseband data.
    • Streaming audio output over UDP.

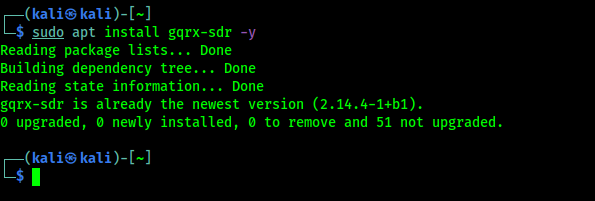
    GQRX comes with Kali Linux repository so we just need to apply following command on our terminal to install it:

    sudo apt install gqrx-sdr -y

    In the following screenshot we can see that gqrx is already installed on our system. The installation process will take some time depending on our system performance and internet speed.

    GQRX installed on Kali Linux

    Now we can just run the gqrx command on our terminal to start the gqrx.

    gqrx

    For the very first time we are running gqrx we got a configuration window. In the following screenshot we shows our working settings (mostly default).

    gqrx first time configuration

    After clicking on “OK” we will be in the gqrx main screen, In the following screenshot we can see that we had successfully running GQRX on our Kali Linux system.

    running GQRX on Kali Linux

    We can see the interface. On the Top left corner we can see the Play button (▶) which can be used to play and pause. In the left-hand side we can see the Receiver options box, where we can set various type of settings, like Frequency, width, mode etc.

    Tuning FM Stations on Kali Linux

    Let we set the frequency to our local FM Radio station. Here we need to remember one thing as we told previously that commercial radio stations only can use 88 to 108 MHZ. Here we can put the frequencies on KHz.

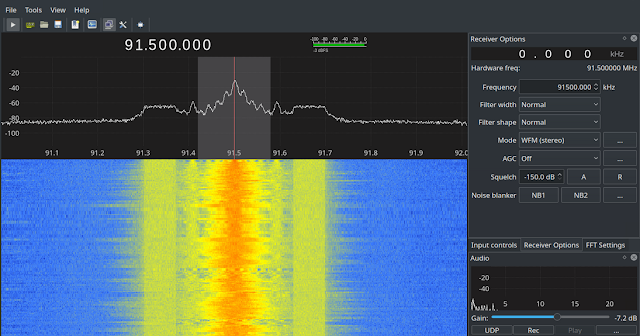
    That means we need to x100 on our MHz frequencies to make it KHz. A simple math. If our local radio station transmitting frequency on 91.5 that means it;s in MHz we need to make it 91500 KHz, and set it to our Frequency on Receiver Options. Then we need to click on the Play ▶ Button. We also need to set the mode to WFM (mono/stereo which sounds good). Now we can listen our radio as we can see in the following screenshot:

    listing radio on Kali Linux
    Listening can’t be captured on a image but we can see the clear radio signals

    YA. We did it! We can learn more on GQRX on GQRX tips and tricks and Decoding off keying.

    Wait A Minute

    Wait a minute. What just we did? We listen Radio on our computer? Why? We can do it on a little FM/Radio Player. People did the same thing since 40’s era. What is new here?

    OK then, we can say we learnt installations and the basic use of GQRX (very powerful tool), we also had setup RTL-SDR on our system. Not only that, Now we can listen radio (no more commercial radio stations, please) conversation on emergency services like fire services, polices/cops etc.

    Emergency services doesn’t uses commercial radio frequencies (88-108 MHZ), In different countries they use different frequencies. If we want to learn about their frequencies we can Google it. We can get the USA database of frequencies here.

    FAQ

    Can we transmit Radio signals using RTL-SDR?

    No. We can’t. RTL-SDR is just a receiver, it can’t transmit radio signals. Transmitting long range signals without proper permission is illegal in various countries. We can check the laws of our respective country to know more on it.

    Is It Legal to listen Emergency services radio?

    This is totally different in various countries. Listening some emergency is not illegal. There are specific laws in all countries we need to know about them by simple Google search. But using a RTL-SDR device is not illegal, misusing it will be illegal. So we can’t show anything on our this article which is illegal to any country.

    Can we listen GSM (2G) calls using RTL-SDR?

    That’s tricky. We know that GSM calls are not end-to-end encrypted, but they are encrypted at many steps along their path, so we can’t just tune into the GSM frequency and listen phone calls over the air like radio stations. We can capture and analyze GSM signals (not directly phone calls) using RTL-SDR. We will cover these things in our future article.

    Hope this will cover the basics of RTL-SDR and it’s uses on Kali Linux. We are going to publish more articles and cover much more things on Software Defined Radio.

    Love our articles? Make sure to follow us on Twitter and GitHub, we post article updates there. To join our KaliLinuxInfamily, join our Whatsapp Channel & Telegram Group. We are trying to build a community for Linux and Cybersecurity. For anything we always happy to help everyone on the comment section. As we know our comment section is always open to everyone. We read each and every comment and we always reply.

  • WebScarab — Web Application Analysis Tool

    WebScarab is a tool that we can use in web security testing. It acts like a web proxy and allow user to intercept the request (HTTP and HTTPS) and web server replies. Sounds familiar? Oh Burp ? Yah, we can consider WebScarab as a alternative of BurpSuite.

    WebScarab is an open source tool developed by The Open Web Application Security Project (OWASP), and was implemented in Java so it could run across multiple operating systems.

    Webscarab Kali linux

    As WebScarab’s default configuration, it uses port 8008 to capture HTTP requests, so we need to configure our browser to use that port in localhost as a proxy. We need to follow the similar steps to configure our browser’s proxy as we did for the Burpsuite only the default port will be 8008.

    WebScarab comes pre-installed with Kali Linux 2020 full version,or we can use following command to install it:

    sudo apt-get install webscarab

    We can find it on application menu.

    WebScarab in app menu

    After opening WebScarab we got it’s main screen like following screenshot:

    WebScarab main screen

    Now we will test it against bwapp on our localhost. We found the request on the “Summary” tab.

    Now we right click on the folder and click on “Spider tree” to see all the requests on the network.

    webscarab spider tree

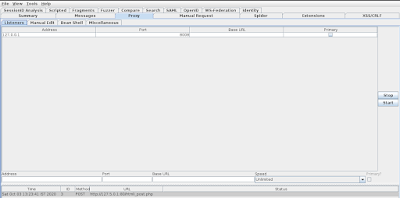
    Now in the “Proxy” Tab we found the listener. Here we can start or stop the listener.

    webscarab proxy listner

    Whenever we do any post request we can see WebScarab’s request editor will come in front of us just like BurpSuite as we can see in the following screenshot:

    edit bwapp's post request

    Here we change some data on post request and click on “Accept” to forward the request.

    editing request on the webscarab

    Here in the following screenshot we can see that we have successfully changed the post request.

    WebScrab changes bwapp post request

    Not only changing post requests this tool can do a lot of things. We just gave this example

    According to WebScarab’s official website it’s main features are following:

    • Fragments – extracts Scripts and HTML comments from HTML pages as they are seen via the proxy or other plugins.
    • Proxy – observes traffic between the browser and the web server. The WebScarab proxy is able to observe both HTTP and encrypted HTTPS traffic by negotiating an SSL connection between WebScarab and the browser, instead of simply connecting the browser to the server and allowing an encrypted stream to pass through it. Various proxy plugins have also been developed to allow the operator to control the requests and responses that pass through the proxy.
    • Manual intercept – allows the user to modify HTTP and HTTPS requests and responses on the fly, before they reach the server or browser.
    • Beanshell – allows for the execution of arbitrarily complex operations on requests and responses. Anything that can be expressed in Java can be executed.
    • Reveal hidden fields – changes all hidden fields found in HTML pages to text fields, making them visible and editable. Sometimes it is easier to modify a hidden field in the page itself, rather than intercepting the request after it has been sent.
    • Bandwidth simulator – allows the user to emulate a slower network in order to observe how their website would perform when accessed over, say, a modem.
    • Spider – identifies new URLs on the target site, and fetches them on command.
    • Manual request – allows editing and replay of previous requests, or creation of entirely new requests.
    • Session ID analysis – collects and analyzes a number of cookies to visually determine the degree of randomness and unpredictability. Note that this analysis is rather trivial, and does not do any serious checks, such as FIPS, etc.
    • Scripted – operators can use BeanShell (or any other BSF supported
      language found on the classpath) to write a script to create requests
      and fetch them from the server. The script can then perform some
      analysis on the responses, with all the power of the WebScarab Request
      and Response object model to simplify things.
    • Parameter fuzzer – performs automated substitution of parameter
      values that are likely to expose incomplete parameter validation,
      leading to vulnerabilities like Cross Site Scripting (XSS) and SQL
      Injection.
    • Search – allows the user to craft arbitrary BeanShell expressions to identify conversations that should be shown in the list.
    • Compare – calculates the edit distance between the response bodies
      of the conversations observed and a selected baseline conversation. The
      edit distance is “the number of edits required to transform one
      document into another.” For performance reasons, edits are calculated
      using word tokens, rather than byte by byte.
    • SOAP – parses WSDL and presents the various functions and the
      required parameters, allowing them to be edited before being sent to the
      server. Note: This plugin is deprecated, and may be removed in the future. SOAPUI is way beyond anything that WebScarab can do, or will ever do, and is also a free tool.
    • Extensions – automates checks for files that were mistakenly left
      in the web server’s root directory (e.g. .bak, ~, etc). Checks are
      performed for both files and directories (e.g. /app/login.jsp will be
      checked for /app/login.jsp.bak, /app/login.jsp~, /app.zip, /app.tar.gz,
      etc). Extensions for files and directories can be edited by the user.
    • XSS/CRLF – a passive analysis plugin that searches for
      user-controlled data in HTTP response headers and body to identify
      potential CRLF injection (HTTP response splitting) and reflected
      cross-site scripting (XSS) vulnerabilities. 


    WebScarab’s spider, similar to the Burp Suite, is useful for discovering all referenced files in a website or directory without having to manually browse all possible links and to deeply analyze the requests made to the server and use them to perform more sophisticated tests.

    WebScarab is a good alternative of infamous Burp Suite. Need more articles? Make sure to follow us to get all our articles directly on notification. We are also available on Twitter and GitHub, we post article updates there. To join our KaliLinuxIn family, join our Whatsapp Channel & Telegram Group. We are trying to build a community for Linux and Cybersecurity. For anything we always happy to help everyone on the comment section. As we know our comment section is always open to everyone. We read each and every comment and we always reply.

  • Ghidra — Reverse Engineering Tool used by NSA

    Kali Linux’s 2021.2 update has made Ghidra integration even more convenient for users. Ghidra is a powerful open-source software reverse engineering tool developed by the NSA, designed for in-depth analysis of binary code. With Ghidra readily available in Kali Linux’s repository, it’s easier than ever to harness this tool for reverse engineering, security analysis, and more.

    For those unfamiliar with Ghidra, it’s not a simple dragon, but rather a sophisticated software that aids security professionals and researchers in understanding and dissecting software components. It’s especially valuable for tasks like malware analysis, identifying vulnerabilities, comprehending proprietary software, and uncovering security issues.

    With Ghidra’s seamless availability on Kali Linux, the process of installing and utilizing this essential tool becomes more straightforward, making it a go-to resource for penetration testing, ethical hacking, and digital forensics on the platform. Stay updated and leverage the enhanced capabilities of Ghidra on Kali Linux for all your reverse engineering needs.

    What is Ghidra ?

    Ghidra is an open-source software reverse engineering (SRE) framework developed by National Security Agency (NSA) Research Directorate of United States, for NSA’s Cyberseurity mission.

    The binaries were released at RSA Conference in March 2019; the sources were published one month later on GitHub. Ghidra is seen by many security researchers as a competitor to IDA Pro. The software is written in Java using the Swing framework for the GUI. The decompiler component is written in C++. Ghidra plugins can be developed in Java or in Python (provided via Jython).

    It is a Java based GUI reverse engineering framework, it is able to de-compile a application from binary and understand the logic of the code. NSA used it to find malwares inside a application, it also very useful for finding bugs on applications.

    How to Install Ghidra on Kali Linux 2021

    Ghidra on Kali Linux install and use

    If we wrote this article before Ghidra comes with Kali (June, 2021, then the installation process will be larger and complex.

    But now we just need one command to install it on our Kali Linux system. We need to use following command:

    sudo apt install -y ghidra

    The above command will install Ghidra on our Kali Linux system. It will download more than 250 MB and take almost 750 MB disk space on our system. So installing it will consume some time depending on our network speed and system configuration. Coffee Break 🍵.

    Ghidra installation on Kali Linux

    How to use Ghidra on Kali Linux

    After installing Ghidra on our Kali Linux system we can open this GUI based tool by using following command to open it up:

    ghidra

    The above command will open Ghidra on our Kali Linux system, or we can search for it on Application menu. As we can see on the following screenshot:

    Ghidra User agreement

    Here Ghidra is showing us the “User agreement” to use this tool. We need to read it carefully then click on “I agree” for the very first time of using Ghidra.

    After clicking on ‘I agree’ Ghidra will open two window, one for help another is the Ghidra framework’s main screen, we can check the help if we want, but here we close it and focus on Ghidra. It looks like the following screenshot:

    ghidra main screen

    Here we can see that we don’t have any active project on our Ghidra. So we need to import a project. We have an exe file here to test. First of all we need to go to  the menu File>New Project, as shown in the following screenshot.

    Ghidra new project

    Then we need to select our new project type, here we are choosing non-shared project.

    project type on ghidra

    We click on “Next”, now we need to select the project location and name. We have chosen the default home path and named the project as we wish, see the following screenshot below.

    ghidra project name and location

    Then we click on “Finish”, to complete creating a new project.

    New project on ghidra created

    On the above screenshot we can see that a new project created on Ghidra.

    Now here we can import an application file. For an example we have an exe file. We can directly drag & drop the application file over the project or we can simply press I to import application file for testing, We can also choose from menu File>Import File.

    Then we need to choose application file to test as shown in the following screenshot:

    ghidra import application file

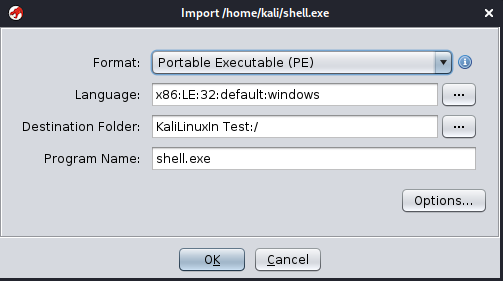
    Here we have choose an shell.exe file for testing. We select it to import.

    import file summary on ghidra

    We can see some details of importing file, we click on “OK“.

    import file summary on ghidra

    Here in this window we can see the import file summary on Ghidra. We press ‘Enter‘ ↩ key here.

    Now Ghidra will import the file and prompt to analyze the application file on CodeBrowser.

    Ghidra prompt for analysis

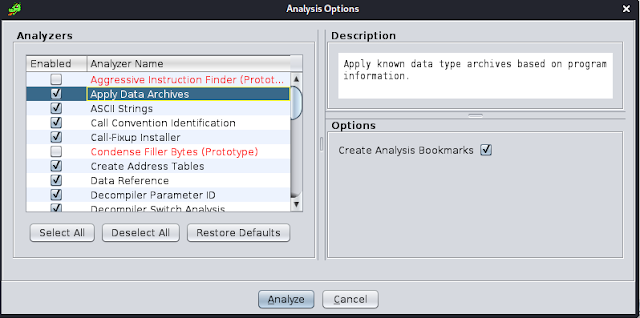
    We click on “Yes“. Then on a new window we need to select analyzers. There are lots of analysis configuration options do exist. We can see a description of every option by clicking on it, the description is displayed in the upper-right Description section.

    Analysis options on Ghidra

    Let’s click on Analyze to perform the analysis of the file. Then, we can see the Ghidra CodeBrowser window. We shouldn’t worry if we forget to analyze something, we can reanalyze the program later (by going to the Analysis tab and then Auto Analyze ‘shell.exe’).

    analysis again on ghidra

    Ghidra CodeBrowser

    Here we are in Ghidra CodeBrowser. From here we can analysis application data and logic. Ghidra CodeBrowser has a good and well-chosen interface. Let’s briefly know about it.

    Ghidra codebrowser details

    Let’s see how CodeBrowser is distributed by default:

    1. Usually, by default in reverse engineering frameworks, in the center of the screen, Ghidra shows a disassembly view of the application file.
    2. As the disassembly level is sometimes a too low-level perspective, Ghidra incorporates its own de-compiler, which is located to the right of the disassembly window. The main function of the program was recognized by a Ghidra signature, and then parameters were automatically generated. Ghidra also allow us to manipulate de-compiled code in a lot of aspects. Of course, a hexadecimal view of the file is also available in the corresponding tab. These three windows (disassembly, de-compiler, and the hexadecimal window) are synchronized, offering different perspectives of the same thing.
    3. Ghidra also allow us to easily navigate in the program. For instance, to go to another program section, we can refer to the Program Trees window located in the upper-left margin of CodeBrowser.
    4. If we prefer to navigate to a symbol (for example, a program function), then we need to go just below that, to where the Symbols Tree pane is located.
    5. If we want to work with data types, then we need to go just below that again, to Data Type Manager.
    6. As Ghidra allows scripting reverse engineering tasks, script results are shown in the corresponding window at the bottom. Of-course, the Bookmarks tab is available in the same position, allowing us to create pretty well-documented and organized bookmarks of any memory location for quick access.
    7. Ghidra has also a quick access bar at the top.
    8. At the topmost part of CodeBrowser, the main bar is located. Now we
      know the default perspective of Ghidra.
    9. Following the current address, the current function is shown.
    10. In addition to the current address and the current function, the current disassembly line is shown to complete the contextual information.
    11. Finally, at the bottom right, the first field indicates the current address.

    Ghidra is highly customizable framework. It has tons of features and also we can run our own scripts on it. Covering every details of Ghidra is not possible on an article. Ghidra is a huge topic we must need an entire book to learn it clearly.

    What just we said? A BOOK? We have it. We have a very good book on Ghidra, which one covers Ghidra in total. Check our Telegram Group to get the book. Here is the Ghidra official Cheat Sheet.

    Love our articles? Make sure to follow us to
    get all our articles directly on notification. We are also available on Twitter and GitHub, we post article updates there. To join our KaliLinuxIn family, join our Whatsapp ChannelTelegram Group. We are trying to build a community for Linux and Cybersecurity. For anything we always happy to help everyone on the comment section. As we know our comment section is always open to everyone. We read each and every comment and we always reply.