Category: Password Attacks

  • Zydra — ZIP Password Cracker

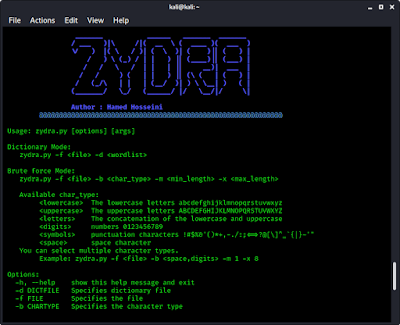
    Zydra is a password recovery tool that can recover passwords from files and Linux shadow files using brute-force or dictionary attack. That means, it can crack passwords of ZIP, RAR and PDF files. Also it can recover passwords of Linux systems using the shadow file (shadow file stores user passwords in Linux system).

    In this detailed article we will learn how we can use Zydra on our Kali Linux system.

    Key Features of Zydra 

    Zydra’s main features are following:

    • The most important features of Zydra is the multiprocessing feature that speeds up the program. For example if we have 8 CPU cores, Zydra will use all of them for processing at the same time.
    • It can be use against Legacy ZIP files, RAR files, PDF files and shadow files.
    • Cracking files password using two methods dictionary method and brute force method.
    • In the brute force method, we can specify the min length and max length of the passwords, also we can specify the type of characters that may be used in the password.
    • A percent progress bar showing how much of the process has been performed.
    • Error handling.

    Installing Zydra on Kali Linux

    We can found Zydra on it’s GitHub repository but before that we will install some dependencies to work Zydra perfectly.

    First of all we update our system by using following command:

    sudo apt-get update

    Then we download some dependencies by using following command:

    sudo apt-get install qpdf unrar

    The above command will install qpdf and unrar on our system as we can see in the following screenshot:

    installing qpdf and unrar

    Then we need to install some Python3 modules using pip.

    pip3 install rarfile pyfiglet py-term

    These will be installed on our system after using above command as we can see it.

    python3 modules for zydra

    Now we just need to download figlet font “epic” for Zydra by using following command:

    sudo wget http://www.figlet.org/fonts/epic.flf -O /usr/share/figlet/epic.flf

    Now it’s time to download the Zydra from GitHub. Either we can clone the whole repository or we can just download the Python script. Let we download just the Python script by using following command:

    wget -O zydra.py https://raw.githubusercontent.com/hamedA2/Zydra/master/Zydra.py

    The python script will be saved our current working directory by the name of zydra.py.

    zydra python script download

    Now we can run the script. First of all we check the help option by applying following command:

    python3 zydra.py --help

    We can see the help menu of Zydra in the following screenshot:

    zydra help

    Either we can read the boring help section of Zydra or continue reading out guide to know the important uses of this tool.

    How to Crack ZIP files password on Kali Linux

    Here we have a ZIP file on our Desktop which is protected by a password. We can see that it prompt for password on the following screenshot:

    zip file protected with password

    Now we try to brake the password with dictionary attack. To perform this we need a password list. We will use the 10k-most-common.txt (password list). It comes with our Kali Linux (/usr/share/seclists/Passwords/Common-Credentials/10k-most-common.txt), which contains 10,000 most commonly used passwords.

    So we open our terminal and our command will be following:

    python3 zydra.py -f /home/kali/Desktop/images.zip -d /usr/share/seclists/Passwords/Common-Credentials/10k-most-common.txt

    Here we have used the -f flag to specify the location of the ZIP file (in our case which is /home/kali/Desktop/images.zip) and using the -d flag we have specify the location of the dictionary (password list). Output shown in the following screenshot:

    Cracked ZIP file password using zydra

    On the above screenshot we can see that we have successfully cracked the password of the ZIP file using Zydra.

    This is how we can use the dictionary attack we also can try without password list. In that case we need to use brute-force attack and we need to specify the type of characters that may be used in the password.

    python3 zydra.py -f /home/kali/Desktop/images.zip -b digits,symbols -m 4 -x 6

    Here we have choose -b flag for brute force attack and specified our password (mixing digits and symbols), then we use -m flag for minimum length of our password (we choose 4) and -x for maximum length of our password (we choose 6).

    ZIP file brute forcing using Zydra

    On the above screenshot we can see that Zydra has created a count of possible password list which is very big (5622834672 passwords). Which will take a lot of time. Also may gives error (but the scan continues).

    Note: Zydra can recover legacy ZIP files password (The standard one). We have created a ZIP file on Linux system (using Archive Manager) Zydra can’t break it. But ZIP files created from Windows and internet works perfectly.

    How to crack RAR files password using Zydra

    Cracking a RAR file’s password is very similar to cracking ZIP file’s password on Zydra. To do it we need to run following command on our terminal:

    python3 zydra.py -f /home/kali/Desktop/images.rar -d /usr/share/seclists/Passwords/Common-Credentials/10k-most-common.txt

    Then Zydra will start scanning the process. Here we have again choose 10k-most-common.txt password list inside our /usr/share/seclists/Passwords directory which is specified by -d flag and our target RAR file is specified by -f flag located on our Desktop.

    After waiting very few moments we got our password, as we can see in the screenshot:

    Zydra cracked RAR file

    Now we can see on the above screenshot that we have successfully recovered the password of the RAR file.

    We also can use bruteforce attack to recover the password. To do that we need to use -b flag in the place of -d flag and we should specify the type of password and length as we did on ZIP files section, an example command is following:

    python3 zydra.py -f /home/kali/Downloads/file.rar -b digits,symbols -m 4 -x 6

    This is how we can Crack RAR file’s password on our Kali Linux system.

    How to Break or Crack Password of PDF file

    Cracking PDF file’s password is also very similar as ZIP and RAR. We just need to use Zydra and tell Zydra the location of PDF file and the location of password list.

    Here we have an example PDF file on our Desktop, which is locked. As we can see in the following screenshot:

    Locked PDF file on Desktop
    Locked PDF file on Desktop

    Now we run Zydra and try to break the password of this PDF file by using following command:

    python3 zydra.py -f /home/kali/Desktop/test.pdf -d /usr/share/seclists/Passwords/Common-Credentials/10k-most-common.txt

    Here we have used -f flag to specify our PDF file location and we used -d to specify location of our passsword list. The output of the command shows in the following screenshot:

    pdf file password recovered using zydra

    We can see that Zydra just not cracked the password it is also create a decrypted PDF file for us.

    This is how we can crack the password of a PDF file using Zydra on our Kali Linux system.

    Recover Linux passwords from shadow file

    Linux’s users password stored (encrypted) on the shadow file,located on /etc/shadow. Using Zydra we also able to crack shadow file’s passwords. Zydra will crack the passwords one by one for every user on the system.

    Either we can copy the shadow file from a system or we can run Zydra on the target system. Here for an example we run copied all the texts from shadow file from another system and saved it on our system (Desktop) in a file called shadow without file extension and try recover the password.

    To do so we can apply following command on our terminal:

    python3 zydra.py -f /home/kali/Desktop/shadow -d /usr/share/seclists/Passwords/Common-Credentials/10k-most-common.txt

    The screenshot shows that Zydra cracked one user and trying for the other

    Zydra recovered linux users password

    If we need to crack our own system’s password then we need to use our root account (also may need to install rarfile pyfiglet py-term there). The command will be following(we need to log in as root, sudo command from non-root user may show error here):

    python3 zydra.py -f /etc/shadow -d /usr/share/seclists/Passwords/Common-Credentials/10k-most-common.txt

    Conclusion

    This is how to crack password protected ZIP, RAR, PDF files using Zydra on Kali Linux or other debian based Linux system. We also can recover password of Linux users using Zydra.

    This is created for educational perpose only we also can use it to recover forgotten password of files. But using Zydra against other’s protected file will be considered crime as per law. So please do not use it to others without proper permission. We will not be responsible if anyone did this.

    Liked our article then please follow our blog’s email subscription for free. We also have Telegram group to direct conversation with everyone. We also update our new articles on Twitter and GitHub make sure to follow us there.

    For any kind of query or problem our comment box is always open to everyone. We read each and every comment and we always reply.

  • WiFi-Pumpkin 3 — Dangerous Access Point

    Sometime on some places we got free WiFi networks. Free WiFi is always a weakness of modern day people. As a cybersecurity expert we always say to not connect to publicly available networks. But why?

    In our this detailed article we learn how WiFi-Pumpkin3 works on Kali Linux 2020 and how black-hat guys steel other’s credentials using a rouge access point. We also discuss about how to be safe.

    Wifi pumpkin3 install in Kali Linux

    We can do this manually, but using Aircrack-ng, configuring the IP tables and using some other tools are time consuming. WiFi-Pumpkin3 do these manually.

    Key Features of WiFi-Pumpkin

    1. Rouge WiFi access point.
    2. Deauth attacks on clients AP.
    3. Intercept, inspect, modify and replay web traffic.
    4. Probe request monitor.
    5. DHCP Starvation attack.
    6. Credential monitor.
    7. Transparent proxy.
    8. Windows update attack.
    9. Phishing manager.
    10. ARP poisoning.
    11. DNS spoof.
    12. Pumpkin proxy (MITM proxy server).
    13. Capture images on the fly.

    Installing WiFi Pumpkin3 on Kali Linux

    Let’s start the installation process of WiFi-Pumpkin. Before installing WiFi-Pumpkin we need to install some requirements like hostapd and pyqt5 on our Kali Linux system. To install them we need to run following command on our terminal:
    sudo apt install python3-pyqt5 hostapd
    After entering this command the installation process will be started. Also we recommend to install some system packages, os-level dependencies for errorless installation and work. We need to apply following command in our terminal:
    sudo apt install libssl-dev libffi-dev build-essential
    After installing these packages we are ready to install WiFi-Pumpkin3 on our system. First we need to clone this from It’s GitHub repository by using following command:
    git clone https://github.com/P0cL4bs/wifipumpkin3
    The output of the command shows in the following screenshot:
    WiFi Pumpkin 3 clonning from GitHub
    Then we navigate to the wifipumpkin3 directory using cd command:
    cd wifipumpkin3
    Now we start the installation process by running following command:
    sudo python3 setup.py install
    We can see that after applying this command, our installation process has been started.
    Installing WiFi Pumpkin 3 on Kali Linux 2020
    This might take a little bit time. Usually this process takes 3-5 minutes depending on our internet speed and system speed. We are taking a coffee break.
    After our coffee finished we see that WiFi-Pumpkin3 installation is finished, it actually install some necessary packages to rum WiFi-Pumpkin.

    Using WiFi Pumpkin3 on Kali Linux

    Now we can run WiFi-Pumpkin3 from our terminal directly by using following command:
    sudo wifipumpkin3
    In the following screenshot we can see that our WiFi-Pumpkin3 is started. We are inside the pumpkin😜.
    Wifi Pumpkin3 on Kali Linux
    Now we configure the access point first. To configure an access point we need to run ap command:
    ap
    Here we get the access point settings. Here we can changes SSID, Channel, Interface and Security.
    In the above screenshot we can see that no interface is selected, we set interface by using set interface <name> command.
    In our case we use wlan0 as our Wi-Fi interface, so we use following command:
    set interface wlan0
    Then we configure our SSID and to get attracted by people we choose a juicy SSID (we named it Free WiFi for social engineering.. he😂he). We can easily make it by using following command:
    set ssid Free WiFi
    Then if we want we can set a security password, in our case we are going to share a rouge access point without password but if we want to assign a weak password we can use set security true after that to set a password we can use set security.wpa_sharedkey myeasypass.
    We disable the DNS log, otherwise it comes on terminal again and again. To disable it we use following command:
    ignore pydns_server
     
    For an example we are going to set a proxy for capturing Facebook passwords. If we set the proxy then whenever someone connects on our free WiFi, our WiFi forcefully navigate the target to a Facebook login phishing page. If the anyone puts credential then we got it.
    Using help command we can see that we can see modules by using show command.
    show
    wifi pumpkin3 show modules

    Here we can see the captiveflask module. to use it we simply apply use command:

    use misc.extra_captiveflask
    Then we can run the help command here. The output is in the following screenshot:
    wifi pumpkin3 module setup

    Here we can see the list from GitHub or we can download available templates. We apply download command.
    download
     

    Wifi pumpkin3 downloading modules

    Then we can install Facebook template by using following command:
    install facebook
    The following screenshot shows the output of applied command:
    installing facebook plugin on wifipumpkin3

    We can see that Facebook plugin is successfully installed. Now we need to reinstall WiFiPumpkin3 tool to see the changes. We need to exit command to exit from WiFiPumpkin3 and again install it by using following command:
    sudo python3 setup.py install
    This will be updated in some seconds. After that we again run this tool by using following command:
    sudo wifipumpkin3
    Again we need to use CaptiveFlask by using following command:
    use misc.extra_captiveflask
    We can see the list by using following command:
    list
    In the following screenshot we can see that Facebook plugin is available to use. 
     

    Facebook plugin for wifi pumpkin3

    Now we need to set a proxy for this. We use back command to get back to the main page of WiFiPumpkin3.
    back
    Now we set the proxy to CaptiveFlask by using following command:
    set proxy captiveflask
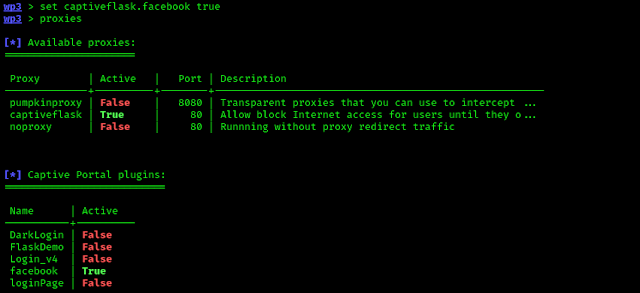
    Our proxy is set to captiveflask and if we want we can see the proxies using proxies command.
    proxies list on wifipumpkin3

    In the above screenshot we can see that Facebook is set to false, so we are going to change it. To make it “true” we run following command:

    set captiveflask.facebook true
    After applying the command we can see that Facebook is set as “true” in the following screenshot.
    set facebook plugin true in wifipumpkin3

    Now everything is done we can run the WiFiPumpkin3 tool by just using following command:

    start
    This will configure some things and start it in some seconds as we can see in the following screenshot.
    wifipumpkin3 start

    Now we open our android device and connect to our created WiFi access point (named Free WiFi).

     
    wifipumpkin3 wifi on Android

    Then our created WiFi access point will say “Tap here to sign in to network”. Our created rouge access point will force our Android device to sign in. It will open Facebook login page as we can see in the following screenshot.

    wifipumpkin3 rouge wifi

    When we puts the credentials here it will be showed on our WiFiPumpkin3’s terminal.

    credential capturing using wifipumpkin3

    In the above screenshot we can see that we got the credentials here.

    That is why we always told that publicly available free WiFi might give us trouble. We need to always be aware.

    Tips:

    To create a CapiveFlask proxy we need internet connection. But if we are using a laptop and a home WiFi network for internet then we need to disconnect our WiFi to create an access point.

    Then what about the internet connection?

    We can get it from LAN connection. In our case we have used a separate USB WiFi adapter (wlan1) to get internet connection for proxy and create the rouge access point using laptop’s inbuilt WiFi module (wlan0).

    Note:- This tutorial is for educational purpose
    only. Stealing account credential is a serious crime. We showed this on our own devices for public awareness. If anyone do any
    illegal activity then we are not responsible for that.

    This is how a malicious access point can be created very easily using WiFiPumpkin3 on Kali Linux 2021. Not only that WiFiPumpkin3 is capable to perform more dangerous attacks. We can try other methods. With some programming knowledge we can create our own captive portals for batter social engineering.

    Liked our articles? Make sure to subscribe our e-mail subscription for free. (We send mail whenever new article releases). We are also available on GitHub & Twitter we also posts updates there.

    For any problem or anything, we always happy to help. Just leave a comment in the comment section below. We always reply.

  • WPScan — Find Vulnerabilities in WordPress Websites on Kali Linux

    WordPress is the leading CMS (Content Management System) in today’s world. Tons of people making their website using WordPress,  for an idea WordPress powers over 75 million sites on the web. This is huge. Almost 37.8% of the internet captured by WordPress.

    But in news we can see that many WordPress vulnerabilities are discovered. WPScan is a tool where we can test vulnerability of WordPress websites. In today’s tutorial we learn how we can find bugs on WordPress websites using WPScan on our Kali Linux system.

    wpscan on Kali Linux

    WPScan comes pre-installed with Kali Linux 2020 versions. We can access it directly from our terminal. On our Kali Linux terminal we need to type following command to see the help of WPScan.

    wpscan -h

    The following screenshot shows us the help section of WPScan.

    help menu of wpscan

    Now we can scan our WordPress website with WPScan tool using –url flag. But we need to make sure that the website belongs to us or we have legal permission to test that website. Because harming others property (read website) is a serious crime.

    We have a locally hosted WordPress site, which is running on our own computer in this tutorial we use it.

    Wordpress running on our localhost

    Now to scan this website or any other website we need the URL or IP address, here in our case the IP address is http://172.17.0.2. We run the following command to start the scan:

    wpscan --url http://172.17.0.2

    The screenshot of the command is following:

    WPScan asking for update
    WPScan is asking for updates

    Here i the above screenshot we can see that WPScan is asking for updates, we press Y for ‘Yes’ and if the update available it will update itself and start scanning our given target. After the scan complete we got a result like following screenshot:

    scan result

    In the above screenshot we can see that we got some vulnerability

    We did not used WPVulnDB API token. However we recommended to use API token from WPScan official website. To create a API token we need to register to WPScan’s website.

    Then we need to crate a free profile and we got a API token for free. Free version is limited to 50 daily requests.

    API token in WPScan
    For security reason we hide API token partially

    Now we again scan the target but this time we scan with the API key. To do this we apply following command in our terminal window:

    wpscan --url http://172.17.0.2 --api-token jvQK8QaynathmKeQzMQcWWQFWBQsjAnn6**OUR**API**

    Now this scan will be performed with API token.

    Using WPScan we can get information of vulnerabilities with some details.

    link of vulnerabilities

    In the above screenshot we can clearly see the vulnerabilities and some links. If we navigate to the given link we can know more about the vulnerability.

    Not only this there are lots of more options. WPScan is a very big tool. To check all it’s options and details we can use following command:

    wpscan --hh

    Here we see all the options available in WPScan. We can read this all and use these functions easily.

    WPScan is very helpful to find security loopholes on WordPress websites. Specially when the WordPress site’s admins didn’t update the themes and plugins. Sometimes in some WordPress site we can see admin still using a vulnerable item.

    In this way a WordPress website can be compromised, as a cybersecurity expert we should not use old plugins or themes on WordPress site. We also should not use third party themes and plugins on Content Management System or CMS (like WordPress, Drupal etc). To test other CMS we should use CMSeeK.

    This is how we can run penetration testing on WordPress website using WPScan on our Kali Linux system.

    Liked our articles? Follow our E-Mail subscriptions to get free notification when we published new post. We are also updated our articles on our Twitter and GitHub. For any problem and query please comment down below, we always reply.

  • OWASP Mantra — Browser for Penetration Testers

    During the penetration testing job we use lots of tools to make things easier. What if we have a browser have some extra functionality for us ? Yes we know that Firefox is a very good option and it is open-source too, Firefox already have lot’s of plugins for doing some awesome things. But in this article we are talking about OWASP Mantra.

    OWASP Mantra in Kali Linux 2020

     OWASP Mantra is specially made for cybersecurity experts or pentesters. This browser is a must have for every security experts. Today we are going to install OWASP Mantra in Kali Linux 2020 versions.

    The main features of OWASP Mantra is following:

    • Switching User Agents.
    • Edit and Replay Requests.
    • Editing Cookies.
    • Editing Local Storage.
    • Disable CSS.
    • Disable JavaScript.
    • View Headers.
    • Native screen-shot capture.
    • Offline mode.
    • Encode and Decode.

    That means OWASP Mantra can Sniff and intercept HTTP requests, Debug client-side code, View and modify cookies also we can Gather information about sites and web applications. That makes it too handy for a web security expert.

    Now to clear the things OWASP Mantra is not a different browser. It is a modified version of Firefox browser.

    First we need to install xterm in our Kali Linux system. Xterm previously comes pre-installed in Kali Linux. To install it we use following command:

    sudo apt-get install xterm

    Then to install mantra on our Kali Linux we just need to type following command in our terminal:

    sudo apt-get install owasp-mantra-ff -y

    Now we can run this browser from our terminal window by using following command:

    sudo owasp-mantra-ff

    It will come in front of us as we can see in the following screenshot:

    owasp Mantra browser

    We can see some tools that we need for our cyber security jobs in the above screenshot. So, we learnt how we can install OWASP Mantra in our Kali Linux.

    We can get the cybersecurity tools in the left panel. All the tools are available in the Main Menu (OWSAP logo) > Tools.

    Tools in Mantra

     There are lots of essential type of tools like

    • Information Gathering.
    • Editors.
    • Network Utilities.
    • Mise.
    • Application Auditing.
    • Proxy

    These tools will help us from the browser. We don’t need to run other programs in Kali Linux for easy tasks. For more detailed information we can visit this site (This tutorial is for older version of mantra).

    Liked our tutorials then make sure to visit our website regularly. Also follow us on Twitter we provide updates there.

    For any type of problems please comment in the comment section. It is open to everyone and we always reply.

  • Fluxion — Crack WiFi Passwords in Minutes

    Fluxion is a security auditing and social-engineering research tool. It is a remake of linset tool by vk496 which is not upgraded for last 6 years. Fluxion have much more functionality. The script attempts to retrieve the WPA/WPA2 key from a target access point by means of a social engineering (phishing) attack. It’s compatible with our Kali Linux.

    fluxion kali linux wifi auditing tool

     Work of Fluxion:

    1. Scan for a target wireless network.
    2. Launch the Handshake Snooper attack.
    3. Capture a handshake (necessary for password verification).
    4. Launch Captive Portal attack.
    5. Spawns a rogue (fake) AP, imitating the original access point.
    6. Spawns a DNS server, redirecting all requests to the attacker’s host running the captive portal.
    7. Spawns a web server, serving the captive portal which prompts users for their WPA/WPA2 key.
    8. Spawns a jammer, de-authenticating all clients from original AP and luring them to the rogue AP.
    9. All authentication attempts at the captive portal are checked against the handshake file captured earlier.
    10. The attack will automatically terminate once a correct key has been submitted.
    11. The key will be logged and clients will be allowed to reconnect to the target access point.

    Installation

    Installation process of fluxion in our Kali Linux is quite easy and simple. As the many other tools we also need to clone fluxion from it’d GitHub repository.

    To clone it we use following command in our Kali Linux terminal:

    git clone https://github.com/FluxionNetwork/fluxion

    This command will clone the fluxion in our system.

    clonning fluxion from GitHub

    Now we navigate to fluxion by using simple cd command:

    cd fluxion

    Now for the first time we run the bash script called fluxion.sh with -i flag to install the requirements to use fluxion:

    sudo ./fluxion.sh -i

    From the next time we don’t need to use the -i flag, we just run:

    sudo ./fluxion.sh

     In the following screenshot we can see that we are installing our missing packages:

    fluxion installing requirements

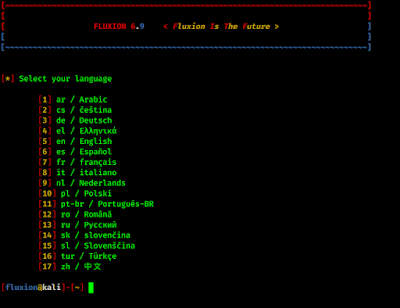
    After installing requirements it will start automatically and prompts for choosing language:

    choosing language in fluxion

    Then we need to select the wireless interface. If our system’s wireless interface supports packet injection and monitor mode then we can go with it. But our Laptop’s wireless chipset does not support injection and monitor mode so we use a Alfa wireless adapter AWUS036NEH (Available on Amazon, all the external wireless adapter in market does not supports monitor mode & packet injection).

    selecting wireless interface

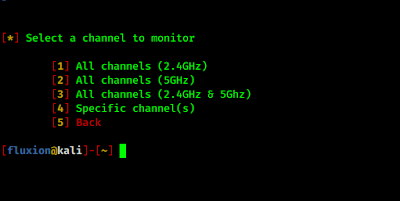
    Then we need to search for WiFi networks around us:

    fluxion selecting a channel

    We can search dual band or any specific channel signals here.
    Then it will start searching wireless networks nearby us.

    fluxion scanning for nearby wifi

    We give it some time to detect all networks then we stop it we press ctrl+x, and it will show us the founded WiFi networks.
    available wireless networks

    Now we select the wireless interface for tracking (If we are not sure what to do then we can skip this by selecting option 3).

    interfaces for target tracking

    Then we need to choose handshake retrieval method:

    handshake captureing methods

    For jamming and monitoring we must need to select interface (in our case we need to select our Alfa card i.e wlan1)

    Interfaces for jamming and monitoring

    Now fluxion prompts for verification hash process we go with the recommended.

    fluxion hash process

    Rest all the options are basics and nothing much to tell about it. Fluxion will de-authenticate all the target connected with our targeted wireless network. When the de-authenticated devices try again to connects fluxion will capture the handshake.

    We can do this type of things also in aircrack-ng but fluxion is advanced and user-friendly. 

    Fluxion is also capable to perform a Evil-Twin attack. In this attack technique we send de-authentication packets continuously to the target that all the client of target device will got disconnect and that time we create another WiFi with the same name and if clients thinks your WiFi as their original they got trapped and we got their credentials. Almost like phishing.

    fluction in action
    Handshake Capturing in Fluxion

    Liked our tutorial then visit us regularly to get news updates and tutorial updates follow us on Twitter and Medium.

    Got any trouble ? Please comment below we are always happy to help you.

  • Hydra & xHydra — Online Password Brute-force tool

    Hydra is a parallelized login cracker which supports numerous protocols to attack. It is very fast and flexible, and new modules are easy to add. This tool makes it possible for researchers and security consultants to show how easy it would be to gain unauthorized access to a system remotely.

    Hydra & xHydra -- Online Password Brute-force tool

    xHydra is the graphical version of hydra, and it is easy to use. Hydra and xHydra comes pre-installed in Kali Linux.

    Hydra supports these protocols: Cisco AAA, Cisco auth, Cisco enable, CVS, FTP, HTTP(S)-FORM-GET, HTTP(S)-FORM-POST, HTTP(S)-GET, HTTP(S)-HEAD, HTTP-Proxy, ICQ, IMAP, IRC, LDAP, MS-SQL, MySQL, NNTP, Oracle Listener, Oracle SID, PC-Anywhere, PC-NFS, POP3, PostgreSQL, RDP, Rexec, Rlogin, Rsh, SIP, SMB(NT), SMTP, SMTP Enum, SNMP v1+v2+v3, SOCKS5, SSH (v1 and v2), SSHKEY, Subversion, Teamspeak (TS2), Telnet, VMware-Auth, VNC and XMPP.

    Hydra works in 4 modes:

    • One username & one password
    • User-list & One password
    • One username & Password list
    • User-list & Password list

    We can check the options of hydra by using following command in our Kali Linux terminal:

    hydra -h

    The screenshot of the command is following:

    We need a username of list of usernames and a password or list of passwords to login on web services. We can found the wordlist files in the /usr/share/wodlists directory of Kali Linux.

    If we want to make custom wordlists then we can use crunch. For a ftp login in our localhost we can use following command:

    hydra -l username -p password ftp://192.168.xx.xx

    Here xx refers to our target IP address. The screenshot is following:

    Here we have used flags -l and -p for single username and password but we also can use -L and -P for wordlists of username and password.

    Then the command will be like following:

    hydra -L /path/of/usernames.txt -P /path/of/pasword.txt ftp://192.168.1.1

    In the way of cybersecurity after scanning with nmap if we find ftp port is open then we can try hydra to bruteforce the ftp login.

    xHydra — Hydra with graphical interface

    There is a graphical version of hydra, it’s called xHydra. It is also comes pre-installed in our Kali Linux machine.

    You can open xHydra from the Kali Linux terminal by using xhydra command:

    xhydra

    This command will open the xhydra as we can see in the following screenshot:

    xhydra

    The above screenshot is xhydra’s target tab. Let’s know about all the tabs and it’s works.

    • Target – Specify the target
    • Passwords – Specify password options & wordlists
    • Tuning – Specify how fast should hydra work. Other timing options also available.
    • Specific – For testing on specific targets like a domain, https proxy etc.
    • Start – Start and Stop the attack & shows the output.

    In the following screenshot we have selected a a target and a protocol in the target tab.

    xhydra target

    Then in the passwords tab we can enter a username or a username list and a password or a password list. Check the cxample in the following screenshot:

    xhydra passwords

    Then comes tuning tab, we put 1 in the field of “Number of tasks

    xhydra tuning

    Then we go to the “Start” tab and choose the start option on the bottom-left corner. The screenshot is following:

    xhydra start

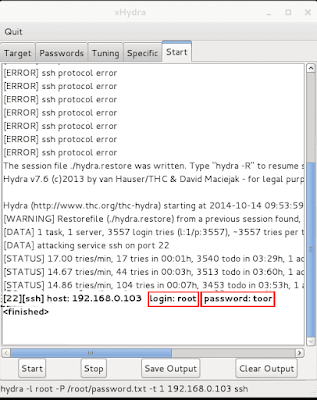
    Then the process will started. Whenever xHydra crack the SSH we can see the username and password below, as shown in the following screenshot:

    xhydra username and password

    This is how we can brute-force online passwords using hydra and xHydra in Kali Linux. This is a very old and useful tool for penetration testers.

    For more tutorials like this visit our website regularly and for quick updates follow us on Twitter and join our Telegram Family. For any kind of problem or suggestion comment down we always replay.

  • Patator — Brute Force Password of Everything

    Weak passwords is a well known vulnerability, due to this most of the corp orates are compromised. Lots of people use weak passwords that can be brute forced and plain text can be obtained.

    Hashes are generated by single-way mathematical algorithms, that means they can’t be reversed. So the only way to crack is to brute force them.

    In today’s tutorial we will learn how we can break password hashes by brute force using patator from our Kali Linux.

    Sometimes, it is possible we have the usernames but we went to try brute forcing the password. Patator is an awesome tool that allows us to brute force several types of logins and even ZIP passwords.

    To see all the options we fire up our terminal window and run following command:-

    patator -h

    The output of the preceding command shows in following screenshot:

    parator options

    Let’s try to brute force an FTP login (We can scan target host using scanning tools like nmap and find open FTP ports).

    patator ftp_login

    The screenshot is following:

    parator ftp bruteforce

    Now we can set the host, user file and password file and run the module using following command :

    patator ftp_login host=192.168.1.1 user=path/of/user-list.txt password=/path/of/ftp_pass.txt

    The following screenshot shows the output of the preceding command:

    parator kali linux tutorial

    If we get the access this will stop running and show us the result.

    Not only FTP login patator can brute force in various types of logins:

    • ftp_login               :  Brute Force FTP
    • ssh_login              :  Brute Force SSH
    • telnet_login          :  Brute Force Telnet
    • smtp_login           :  Brute Force SMTP
    • smtp_vrfy             :  Enumerate valid users using SMTP VRFY
    • smtp_rcpt             :  Enumerate valid users using SMTP RCPT TO
    • finger_lookup       :  Enumerate valid users using Finger
    • http_fuzz               :  Brute Force HTTP
    • ajp_fuzz                :  Brute Force AJP
    • pop_login              :  Brute Force POP3
    • pop_passd             :  Brute Force poppassd
    • imap_login            :  Brute Force IMAP4
    • ldap_login             :  Brute Force LDAP
    • smb_login              :  Brute Force SMB
    • smb_lookupsid      :  Brute Force SMB SID-lookup
    • rlogin_login           :  Brute Force rlogin
    • vmauthd_login       :  Brute Force VMware Authentication Deamon
    • mssql_login            :  Brute Force MSSQL
    • oracle_login           :  Brute Force Oracle
    • mysql_login            :  Brute Force MYSQL
    • mysql_query           :  Brute Force MySQL queries
    • rdp_login                :  Brute Force RDP (NLA)
    • pgsql_login             :  Brute Force PostgreSQL
    • vnc_login                :  Brute Force VNC
    • dns_forward           :  Forward DNS lookup
    • dns_reverse            :  Reverse DNS lookup
    • snmp_login             :  Brute Force SNMP v 1/2/3
    • ike_enum                :  Brute Force IKE transforms
    • unzip_pass              :  Brute Force the password of encrypted ZIP files
    • keystore_pass         :  Brute Force the password of Java keystore files
    • sqlcipher_pass        :  Brute Force the password of SQLCipher database
    • unbraco_crack       :  Crack Umbraco HMAC-SH1 password hashes
    • tcp_fuzz                  :  Fuzz TCP services
    • dummy_test            :  Testing Module

    In this way we can run brute force attack on such many kinds of logins using patator in our Kali Linux system. If you liked us Then Follow us on Twitter and Medium.

  • How to Reset Forgotten Password of any Windows

    In this digital forensic tutorial we are going to learn how to reset forgotten password of Windows 7 or Windows 8 or Windows 10. Using this forensic method we can unlock any Windows devices without knowing the user password and without formatting the hard disk.

    reset forgotten password of windows

    Suppose we work in a digital forensic lab and we got a crime case with a locked Windows computer. We have to unlock it to collect evidence. This method also work for anyone who forgot password of a Windows computer.

    To perform this forensic experiment we use a little program called chntpw. This chntpw can change password of a user in Windows SAM files, even this program can edit Windows registry. This free forensic tool comes pre-installed in Kali Linux.

    Here suppose we got a locked Windows laptop running Windows 8, and we don’t know the password. Now we have to change/reset the password to get administrative access in this laptop. To do this we need a live USB installed Kali Linux on our pen drive. Now how to do this ? Making a live bootable USB of Kali Linux is very easy follow this tutorial.

    Now we need to open the BIOS settings on the locked computer and plug our USB pen drive where we have our Kali Linux installed and boot the PC from external removable USB devices. We got this on the boot menu on BIOS settings.

    This process depending on the motherboard.

    Here we boot Kali  Linux as live boot.

    After boot we can see Kali Linux on the PC and we can use any tool of Kali Linux now.

    So we have booted live Kali Linux in the locked Windows pc. Now we open file manager go to the Windows hard disk as shown in following:

    Windows Drives in Kali Linux
    The 377GB Volume is our Windows Drive (This will be not same for everyone)

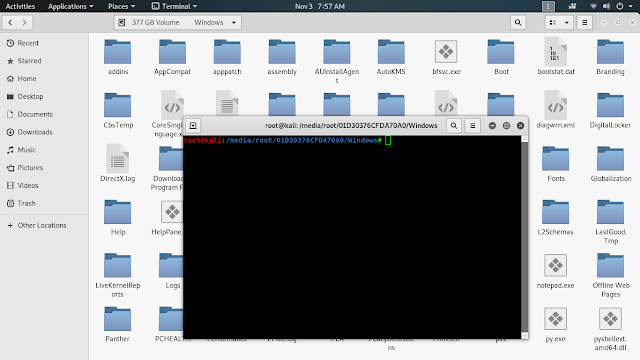
    Here we go in to the Windows folder, and then open terminal there by right click.

    Treminal in windows folder

    To reset the password we need to configure SAM files located in System32/config/  . So our command will be following:

    cd System32/config
    system32/config

    Then we check for the SAM files by using ls command:

    ls -l SAM*

     The screenshot is following:

    removing windows password

    Here we are going to changes on SAM files. Before do it we can back-up the SAM files. If anything goes wrong then we have the back up files to restore as previous.

    Now we check the options of chntpw by using following command:

    chntpw -h

    The screenshot of the command is following:

    chntpw reset password of windows

    First we use the -l flag to see all the users in the SAM file:

    chntpw -l SAM

    We can see the list of users in the following screenshot:

    chntpw running

    Using chntpw tool tool we can make any user to admin user bat for now we change the password of KPAL user.

    Now we use following command to change anything on KPAL user:

    chntpw -u KPAL SAM

    Then the user edit menu will appear in front of us as following screenshot:

    user edit menu

    Here we can see in the screenshot we got some option.

    1. Option 1 will clear the password of selected user.
    2. Option 2 will unlock or enable a disabled user account.
    3. Option 3 will promote the selected user to admin user.
    4. Option 4 will add selected user in a group.
    5. Option 5 will remove selected user from a group.
    6. Option q is for quit.

    Here we will choose option 1 to clear the password and hit enter the screenshot is following:

    password cleared

    Now we need to save and quit this. For this we type q and press Enter for quit then chntpw will prompt if we wan’t to save these files or not ? Here we hit y for yes and press enter as the following screenshot :

    chntpw done

    Now we can log in the Windows user without password. 

    Now we can turn off the system and remove the USB bootable Kali Linux.

    Then we change the BIOS boot menu to boot it from hard disk. Means we revert the changes in BIOS. Then we boot as normal and we do not need password to log in as KPAL user.

    So here we have learned successfully removed password of this Windows and we can collect all information. We can assign a new password to change password if we wish. This is a very easy task and a must know for every penetration testers and digital forensic experts. By this method we can change or remove password of any Windows.

  • SocialFish V3 — Next Genaration Phishing Toolkit | Kali Linux

    Phishing is to easiest method to get anyone’s social media password. We have learned many ways to do phishing in some previous tutorial like :-

    But SocialFish version 3 makes the most easy way. Anyone can create phishing links by some clicks only. Social Fish version 3 have a web based user interface which is more user friendly. The previous version of SocialFish have only command line interface, but previous version is featured with Ngrok integration, for that in previous version we can use our attack over internet but in this version we can attack in our local network only (Don’t worry we have a solution please read till end).
    The previous version of SocialFish is grate but the latest update have a clean web interface that is very good for beginners.
     
    Socialfish v3 phishing toolkit for kali linux

    Before installing SocialFish we need to have Python3 and pip3 installed in our Kali Linux system. New versions of Kali Linux comes with Python3. We prefer to read our tutorial about installing pyhton3 in Kali Linux.
    We need to clone SocialFish from it’s Github repository, to do that we apply following command in Terminal :
    git clone https://github.com/UndeadSec/SocialFish
    The following screenshot shows the output of the preceding command:

    socialfish git clonning

    Then we will change our directory to SocialFish by using cd command:
    cd SocialFish
    We need to install requirements to run SocialFish in Kali Linux. To install requirements we use following command :

    sudo pip install -r requirements.txt

     This command will install necessary tools to run SocialFish, this may take a little bit time depending on internet connection. The screenshot of the command is following:

    Socialfish requirements.txt

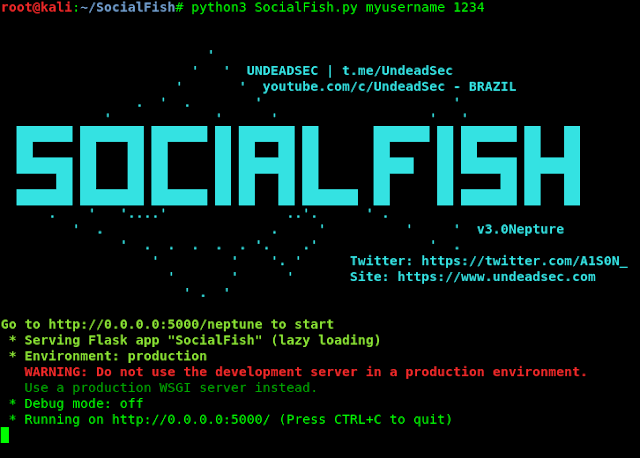
    Now we can crate a web interface that will help us to manage our phishing attacks, but we need to configure SocialFish by pick a username and password to login the web interface. We use following command to set a username and password:-

    python3 SocialFish.py username your_password

    We can choose our username and password in above command.

    socialfish v3 pshishing kali linux

    Then SocialFish will finish it’s settings and we should be able to access the web interface by navigating to the URL http://0.0.0.0:5000/neptune in our browser. The screenshot is following:

    socialfish v3 phishing creator login

    We can see the login page here we type our username and password that we just set up, and then we click on “Login” to access the SocialFish portal.

    socialfish portal phishing kali linux

    Inside the SocialFish web interface, we can see many features and important information.

    socialfish v3 menu

    At the top we can see the field where we can put website for clone, and the website link redirection, and the URL for our attack. For our demonstration we choose twitter.com/login as target and twitter.com will be the redirecting link. If they already logged in, our phishing attack will look like a normal successful login process. After entering both links we need to click the lightning bolt to active the link as shown in the following screenshot.

    socialfish v3 set phishing

    Now we will open a separate browser window and open the attack link that is http://0.0.0.0:5000

    Socialfish v3 phishing kali linux

    This Attack link will work for LAN devices. That means this link only work for same network devices. WE can forward it globally via SSH. To know more read our Easy port forwarding using SSH tutorial. We can use Social engineering technique to increase the chance of clicking by target. To know more about social engineering ideas read our Social Engineering tutorial.

    SocialFish version 3 is very advanced and simple phishing toolkit. We can edit custom pages even we can include beef-framework browser exploitation attack with phishing page, and much more capabilities comes with SocialFish v3.

    If any error comes running SocialFish then try command:

    sudo pip3 install -r requirements.txt

    instead of sudo pip install -r requirements.txt then run the SocialFish.

    SocialFish is developing a mobile based interface to run SocialFish on smartphones. That will make this tool more handy.

    How much enjoyed SocialFish v3 tutorial? Please leave valuable comments below or if you have any questions?

  • Cracking Hashes — Offline and Online

    It’s always a good idea to check hash online, if it has been cracked already then it will be very easy to figure it out. We will learn about some cool websites to decrypt /crack hashes in online but websites and online services may not available everywhere, and assume those websites can’t crack our hash in plain text. In that cases, we should use offline tools. There are some grate hash cracking tool comes pre-installed with Kali Linux. But first of this tutorial we learn John,  Johnny this twin tools are very good in cracking hashes and then we learn online methods.

    Offline Methods 


     John the ripper

    John the ripper is free and open source tool. To use this easy and awesome tool just open terminal window and call his name “john“.

    john

    John will show all his option just like the following screenshot:

    What we need to do now to crack a hash?

    First of all we need to know what kind of hash encountered with us. We learned  identify hashes in our previous tutorials Know The Hash and Hash-Id .

    And we need to ready our word-list which will brute-force the hash. We also have an article on it read that by clicking here.

    Now type the following command

    john --format=raw-md5 --wordlist=/path/of/wordlist/demo_word_list.txt /path/of/hash/demo_hash.txt

    The screenshot is following:

    Now we can see our hash has been cracked successfully. The hash was 2f47a213cacefc2f8bd4ec9325a1b3c5 .

    Johnny

    Johnny is brother of John the ripper. Why? The work of John and Johnny are almost same. Basically Johnny is a GUI client for John. When it adds UI, it becomes very easy to use it.
    To run it we need to open our terminal window and type following command:

    johnny

    Then the GUI tool will start up like the following screenshot:


    Now we  load the hash file by clicking the Open Passwd File option. We can see our file has been loaded in following screenshot:

    Then we need to go in the Options and choose/type the format of hash, and then specify the directory of wordlist file in the Wordlist section.

    Once it is done we click on the Start new attack we should see our password when it’s cracked.

    Online Methods

    Hashkiller

    Hashkiller is a grate online service where we can submit our hashes, if it has already cracked it will show the plain text. This website did not crack hashes in realtime it just collect data on cracked hashes and shows to us. Here is the link of Hashkiller – https://hashkiller.co.uk/.

    This website supports MD5,NTLM,SHA1,MySQL5,SHA256,SHA512 type of encryption.

    CrackStation

    CrackStation is a online service that supports various type of encryption. They have a 190GB 15-billion-entry lookup table for MD5 and SHA1 hashes.
    The link of CrackStation is : https://crackstation.net/.

    CrackStation provide us a wordlist we can use that on offline cracking. The download link is : https://crackstation.net/crackstation-wordlist-password-cracking-dictionary.htm.